
When you Google: How to create Music Website, you come across the building steps right away, which is not the best way to go about it. You need a detail-oriented approach to do something so technical.
So how do you handle creating a website for your band? If you have the support of a producer or a label, you can easily get a couple of thousands of dollars to hire professionals. What if you’re trying to get recognized on your own?
You’d have to get some free software and create a website yourself. With our guide on how to create music website, it’s going to be easier than you’d imagine.
Here’s where you start.
Choosing the right platform
Since you’re not a programmer, you’re going to need some software to create your website. It’s this choice that’s going to make or break your website’s success. If the software you choose is too expensive, has too few features, or simply doesn’t have a collection of themes that look good, it’s going to fail you in the long run.
Luckily, you have plenty of options to choose from. There are dozens of website builders that allow you to create music website of your own.
In this article, we’ll focus on the two of them that are the best for creating a music website, Bandzoogle and WordPress.
Here’s what you have to know about them.
Create Music Website in Bandzoogle – Pros & Cons

Bandzoogle is significantly less well-known than WordPress. It has its upsides, though.
- Designed by musicians, for musicians.
- Hundreds of music-related themes.
- Full range of features for $16 a month.
- Music-related monetization like ticket pre-sales.
- Significantly less learning needed.
- Free hosting and domain.
It has some downsides as well.
- Fewer customization features.
- Significantly fewer themes.
- No plugins.
Create Music Website in WordPress – Pros & Cons

WordPress is the biggest website builder out there.
Here’s why many choose it over the competition.
- Will be supported forever.
- Has thousands of themes.
- Easily customizable.
- Plenty of free and premium plugins.
- Supports big, feature-heavy websites.
- It has a free option.
- An $8 a month plan covers most needs.
- Free hosting.
It’s not perfect, however. Here’s why you may WordPress overestimated.
- Proper monetization for a band starts at $25 a month.
- Few free templates are a good fit for a music site.
- Adding audio is a premium feature.
- It takes time to learn.
- The free domain you get is a WordPress.com subdomain.
Also, some WordPress plugins have security issues, so you may want to protect against hacking if you’re choosing this platform.
Above, we have listed pros and cons of each platform to choose the right one.
If you wish to go with BandZoogle then follow our step by step guide to build musician site on BandZoogle
Or
If you wish to go with WordPress then follow our step by step guide to build musician site on WordPress
How to create music website using Bandzoogle
1. Create an account
Creating an account on Bandzoogle is a bit faster than in WordPress. It only takes four steps.

After you name your website and enter the email and the password, you can choose the website language and press “Create a site.” That’s it.

2. Choose the theme
Checkout our article on the Best Designed Music Websites, for your inspiration.
Supposing you already have band imagery to place in the theme, let’s choose the template. Bandzoogle may not have thousands of templates, but it has enough to suit every taste.
You can browse the templates by genre. We’ve picked “Rock” templates for our death metal band.

Hover over the theme and click Apply to see a preview.

3. Configure the home page
The next step is adding your own cover image. Click replace and upload your image. Bandzoogle lets you add a stock picture, but it’s always better to show your own photos or designs.

We’ve chosen Sinfury’s album cover for the hero image of the website.
Upload your image and apply it to the website.

You can resize the image with on-screen controls.

The next stage is setting up a title. It’s your band’s name that’s going to be displayed across every website page. You can change the typography while you do that.

The other option is adding a logo. It’s going to be displayed instead of the band name.
![]()
4. Fill up the page
Add more features to the home page. A preview of your music may be a good option for this.

Press the “Music” button, and you’ll add a new section to the website. Start filling it up with content.

Press “Add your tracks” to upload music to the page. Choose from these options and go through with the upload.

Bandzoogle is great for musicians because it has a decent player that you can make site-wide. Depending on your connection speed, it may take a bit of time to upload your tracks.

Once the upload is done, you can go back to editing the page. Press the “Add feature” button to add a new section to the home page.

Then, place the new section somewhere on the site.

We’ve chosen the event preview section. From there, you can set up your first event.

If you’ve upgraded to the most expensive plan at $16 a month, you can sell tickets directly from your website.

If one event isn’t enough for the preview, choose a different number of columns in the layout and add more events.

The next section might be your team introduction. Choose the “Image and Text” category and upload a picture.

You can edit the text in the sidebar to your right. If you don’t want some text to be displayed, just delete it as we did with the subheading.

In the sidebar, you can also change the background color and padding of the section.

5. Add social media
Click on the “Add a social media link” on the site-wide menu to connect your Instagram or Facebook profile.

Choose the website from the list, and type in your Instagram handle.

Now, you see the Instagram icon pop up. But it’s too small for this menu. Let’s make it bigger.

Go to the navigation bar on the top and press the “Edit theme.”

Scroll down to the Site-wide section and change the button size.

Now, your visitors will be able to notice the button.

6. Set the site icon
The site icon is displayed in the corner of the tab where your website is open. On HostingPill, it’s a small pill.
![]()
It can be whatever you want on your website. Go to Pages > Site-wide settings.

Then, click on “Site Icon.”
![]()
Upload your band’s logo or any other picture you want to be displayed there, and it will automatically resize.
![]()
7. Create other pages
Now that the home page is finished, it’s time to create more pages for your website. Click on Pages > Add a page.
There are plenty of templates to start with. Let’s create a store for your digital goods and merch.

The layout is simple, but it works just fine.

Click on “Merch” and add a new product.

Go on creating more pages. Just as in WordPress, you may need to create these pages:
- About us
- Albums
- Gallery
- Gig schedule
- Store
- Contacts for agencies
Unlike with WordPress, though, you don’t need to add each page to the site-wide menu. They appear there automatically.

8. Launch it
Once every page is set up, every product is listed, and you’re ready to announce the presale of your next album, the only thing that’s left to do is to launch the website.
Go to the “Upgrade” section to do that.

Select a plan, choose a domain name, pay for it, and your website is live.
How to create music website with WordPress
1. Get a WordPress account

WordPress offers you to create a website for free. The first step you have to go through is creating an account and skipping the payment process.
You can skip this stage and continue with your Google or Apple profile.
The process you go through when you continue creates a simplistic website. Here’ what WordPress offers you when you search for music during that process. There’s no choice, you’ll just have to click through the installation process to be able to modify the website later.

Now, WordPress wizard wants you to get a domain name.

If you’re not ready to purchase a domain name just yet, go for the free option. It’s right below the suggested options. You’ll be able to transfer your website to a new domain later.

If you already have a domain, you can connect it by clicking on this button. Don’t type anything in the search bar, and it will be accessible.

The last thing to do is to choose the billing plan. If you don’t want that now, continue with the free plan.
2. Make the website private
If you do own a domain name, testing a new website live may hurt your users’ experience. Make it private to make sure you roll out the fine-tuned version of the website.
You can do it in a plugin, or save yourself the time and just publish the pages privately.

If you’re creating a music website on a free domain, don’t worry about this step. Your fans don’t know about this page, so it’s essentially private.
3. Prepare great photography
There’s only so much a website layout can do for you. You need to invest in amazing photography that would capture your band’s spirit. That’s what is going to make the website truly yours.
Start by asking a professional photographer to come to your gig and take a few shots of the action.

Source: Sinfury/Instagram
Atmospheric photoshoots like this one are a great idea too.

Source: Stan Gomov/Katlbut
4. Find a theme
Now that you have great photos to place in the website template, it’s time to find a template that would work best for your band. Go to your panel and click on Design > Themes.
Now, you can change the theme of your website.
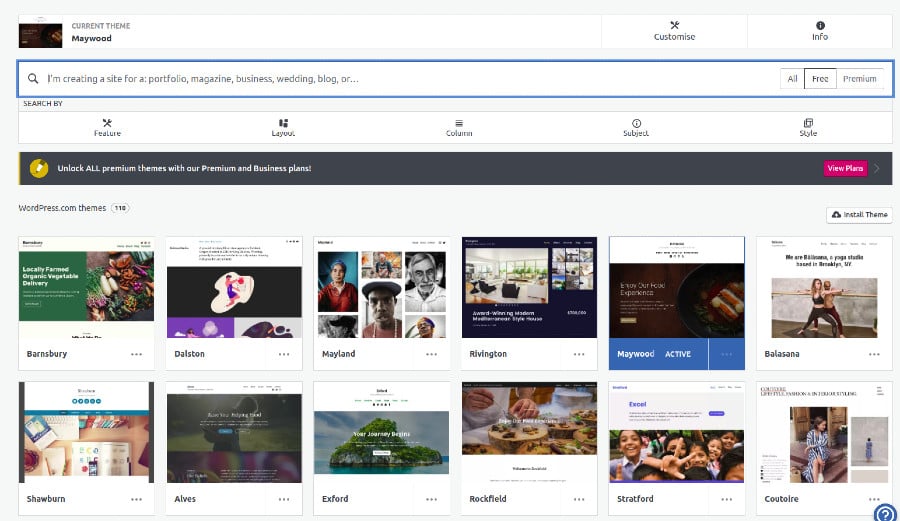
The problem with WordPress is that it has plenty of templates but many of them are premium. For instance, you’d have to pay $69 to use this one.

The default Maywood theme was one of the best themes for a simple music website, so we stuck it. You can choose any theme that you like and press “Activate this design.”

5. Choose logo and icon
It’s time to customize your theme. Go to Design > Customise, and click on Site Identity in the menu.

Add a logo to the website, and create a title. The title is what you’ll see in the search results, so be extra attentive to it.

Crop and center the logo and proceed.
![]()
6. Edit the home page
You don’t need to create the home page, it’s already there. But you can’t access it from the Customise section. Go to Site > Pages, and choose the Home page. Click on it to edit it.

Some of the features of the WordPress block editor are displayed on the side panel.

Some are shown directly over the block.

Now, change the text on the page to your band’s name. You can add some supporting text by clicking on the extended menu and pressing “Insert after” to create another block.

We’re creating this sample website for a death metal band called Sinfury. This cover doesn’t look metal enough, let’s change it.

Click on the cover image, and press edit, the pencil icon. It will take you to the file system. Upload a new image by clicking “Add New.”

The next step is uploading your songs. You can create a separate page for your albums later, we’re going to display some of your music on the home page.
Here’s another problem with WordPress. You can add the Audio block, but it’s only available for premium users.

Don’t worry, you can still showcase your music in the free plan. Go down the list of blocks, and find the category called Embeds.

Choose SoundCloud or Spotify and proceed. We’ve chosen SoundCloud for this website. Go over to the site and copy the embed code.

Create a new block, and embed your track or tracks in it. Here’s how our home page looks like with an image upgrade and a track featured on it.

7. Fill up the rest of the page
The content of the home page is up to you. We decided to place another section that tells the readers to come to the next gig of this band.
Hover over the end of the block, and press add a new block.

Make it a cover image and press Align > Full width to make it span across the website.

Upload a photo and write some text over it. Add a button that leads to the page with the list of gigs. You can add the button by going to the Layout Elements folder.

Here’s how the section would look like.

Align the text on the center to make it look like this.

8. Delete the unnecessary
You can repurpose most design elements. But you don’t need all of them. For instance, this block is useless for a music website. Click on the extended menu and press Remove Block to delete it.

9. Create the other pages
Once you finish your home page, it’s time to create other pages. Go to Site > Pages, and add a new page.

Choose a template mage from the list and proceed.

Here’s the list of pages your website might need.
- About us
- Albums
- Gallery
- Gig schedule
- Contacts for agencies
Free themes often don’t have the exact templates you need, but you can repurpose them.
For instance, you can use the Portfolio template from this theme for both gallery and albums.

The services page can be repurposed for gig announcements.

Work on the pages the same way you worked on the home page.
9. Set up the menus
Once all the pages are ready, it’s time to create a site-wide menu. Go to Design > Customise and choose Menus from the sidebar.

Create a menu item for each page you have. It will be displayed on all pages of the website.
10. Launch it
When you’ve finished running tests and perfecting the design, it’s time to launch it. Go to the main page and hit the Launch button. You’ll have to go through this menu.

This is the stage where you should either buy a domain from WordPress or connect your own. Alternatively, you can export the website to post in on your own domain and hosting.

Wrap up
After going through this long read, you know at least two ways to create an amazing music website. Whether you’ve chosen WordPress or Bandzoogle as your preferred platform, the website you create will be the start of something great.
Save this article to go back to it later when you need to create your music website.


