How to Fix the ‘ERR_CACHE_MISS’ Error Message in Chrome

ERR_CACHE_MISS Introduction

The ERR_CACHE_MISS error indicates that the site you’re visiting requires you to provide data to progress.

ERR_CACHE_MISS Error Screenshot

You may have already done so, but the site asks for it again. However, if the issue keeps occurring, it could indicate a problem with the web browser being utilized. Cache issues or wrong setups could cause the resubmission problem.

ERR_CACHE_MISS is a Google Chrome-specific error that can occur at any time while trying to contact a particular website by inputting the URL or by clicking on a link inside the website.

Because the problem is more closely linked to the browser than to the operating system, it can occur on any version of Windows and other systems like macOS.

There are several reasons why you might be receiving this message, including:

  • The cache files from the site you’re attempting to view are unavailable to your browser.
  • Your browser, browser settings, or browser extensions have faults, corruptions, or inefficiencies.
  • The website you’re trying to access has issues with code or PHP.

Ways to fix the ERR_CACHE_MISS error:

The ERR_CACHE_MISS problem usually goes away after restarting the browser. However, if that doesn’t work, you’ll need to try a few other things, such as:

Fix 1: Clearing the browsing data and cookies.

Some of the files on your browser data may be corrupt if you haven’t purged them in a long time. The only way to verify this is to delete all browsing data. Select the Basic data clearing option if you don’t want to lose any saved passwords or other personalized data.

Follow the steps given below:

Step 1: Open the browser, click on three vertical dots from its top right corner.

Step 2: Next, from the opened drop-down menu, select the ‘Settings’ option.

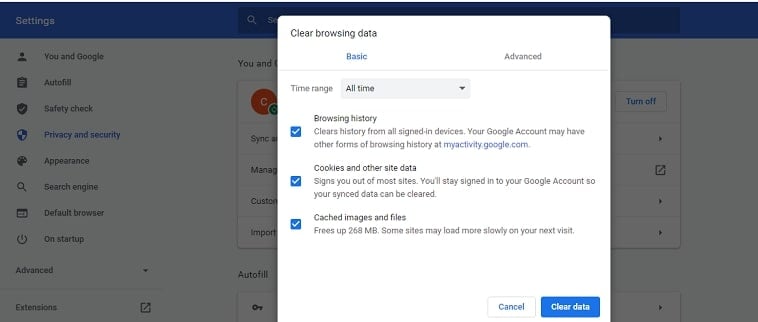
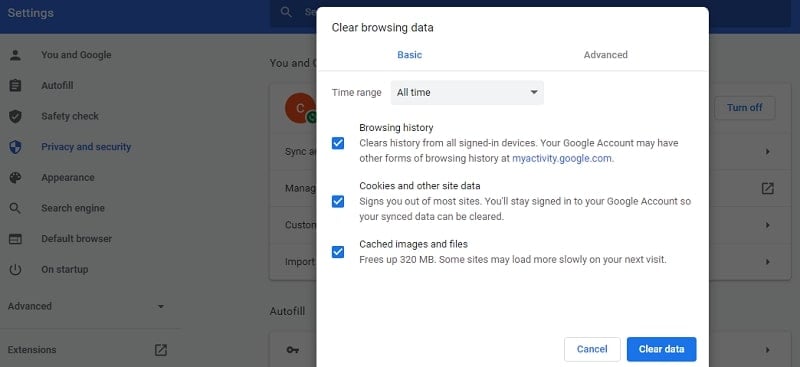
Step 3: Click on ‘Privacy and Security’ from the left-side menu and then click on the ‘Clear Browsing data’ option.

cache clear browsing data

Step 4: You will find three check-boxes; tick all three of them.

Step 5: Select the time as ‘All time’ and then click on the ‘Clear data’ stating-blue button.

cache clear all data

Restart Google Chrome and see whether the error still exists.

Fix 2: Disabling any suspicious browser extensions.

If the ERR_CACHE_MISS problem appeared shortly after installing a free app, it’s likely that you installed a potentially undesirable program (PUP) and permitted third-party browser extensions to be installed.

The latter can lead to a variety of browser issues, including the err cache miss bug. In such a case, you must disable those suspicious extensions and try reloading the website again.

Follow the steps given below:

Step 1: Open the browser, click on three vertical dots from its top right corner.

Step 2: From the drop-down menu, select the ‘More tools’ option.

Step 3: A new drop-down menu will show up; select the ‘Extensions’ option from there.

Step 4: Now disable the extensions that you find suspicious or try disabling them one by one and revisiting the website to check if any of them is the cause of the ERR_CACHE_MISS error.

ERR_CACHE_MISS: cache extensions

Fix 3: Checking for the updates of the browser.

Keeping Chrome up to date can help you fix Chrome crashes that aren’t explained. For example, if you’re getting an ERR_CACHE_MISS error a lot, it could be a sign that your browser is out of date.

New browser versions provide critical bug fixes as well as new functionality. So while updating your browser isn’t sure to solve the problem, it’s worth a go before resorting to more severe measures.

Here is how you can check for the browser updates and make the updates effective:

Step 1: Open the browser, click on three vertical dots from its top right corner.

Step 2: Next, from the opened drop-down menu, select the ‘Settings’ option.

Step 3: Click on the ‘About Chrome’ option from the left-side menu.

ERR_CACHE_MISS: cache chrome update

Google Chrome will begin searching for and installing any available updates automatically. If it doesn’t, click the Google Chrome Update button.

Now restart Chrome and try to revisit the website.

Fix 4: Running the internet connection troubleshooter on your system.

Running one of the built-in troubleshooters could be a Windows-related answer to solve various errors, including the ERR_CACHE_MISS error.

Follow the below-mentioned steps to accomplish this.

Step 1: Click on the Windows gear icon and then go to the control panel.

Step 2: Now choose the ‘troubleshooting’ option and then click on ‘Network and internet’ from the opened window.

cache network and internet

Step 3: Now select ‘Internet connections’ and start with troubleshooting to detect the problem.

cache troubleshoot

Step 4: Fix the visible issues and as the troubleshooting completes, reboot your system.

When using Google Chrome, you should be able to observe if this method worked.

Fix 5: Resetting Google chrome.

You will lose all saved configurations, bookmarks, saved passwords, autofill forms, and similar information if you reset your web browser.

As a result, keep everything you need and then follow these steps to fix the ERR_CACHE_MISS error:

Step 1: Open Chrome, select the three vertical dots, and choose the ‘Settings’ option from the drop-down menu.

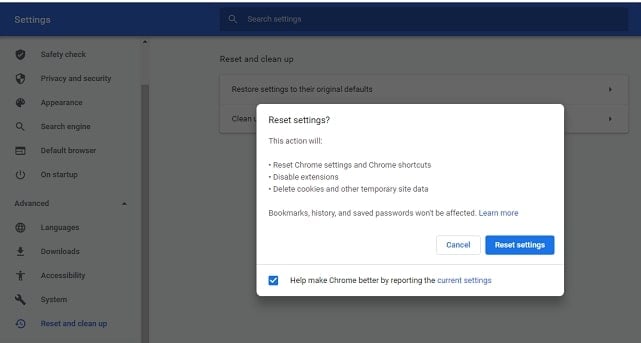
Step 2: Now click on the ‘Advanced’ option and move to ‘Reset and Cleanup’ from the menu available.

Step 3: Click on the ‘Restore Settings’ option and then click on the blue button stating ‘Rest Settings.’

ERR_CACHE_MISS: cache reset

Fix 6: Turning the cache system off.

This workaround will only work if you are in Developer Mode. The caching system will be enabled automatically whenever you exit it. As a result, once you’ve disabled it, see if the issue goes away.

Step 1: Open Chrome and press the buttons ‘Ctrl + Shift + I’ and then click F1 for opening the settings in developer mode.

Step 2: Go to the ‘Network’ option and then mark the check box specifying the ‘Disable cache’ option.

ERR_CACHE_MISS: cache disable cache

Now refresh the website that previously returned the ERR_CACHE_MISS error.

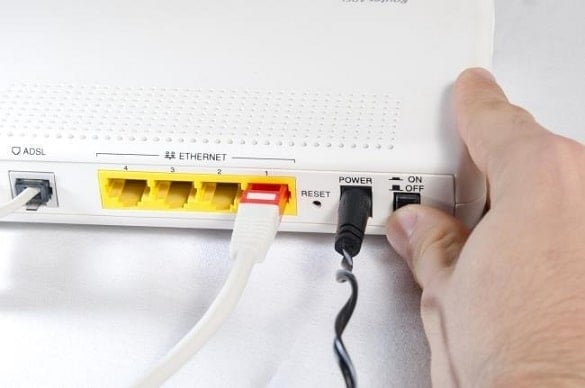
Fix 7: Resetting the network settings.

If none of the above solutions worked, try resetting your network settings. This is the last option for this problem, so if it doesn’t work, we recommend contacting the website’s administrator and informing him of the issue.

Here is how to reset the network settings of your system:

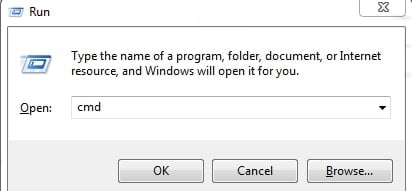
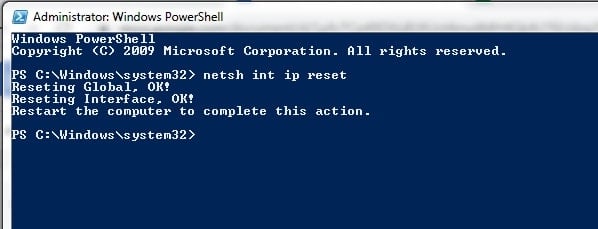
Step 1: Open the ‘Start menu’ and then select ‘Command Prompt’ or ‘Windows Powershell.’

Step 2: Now type the following commands and click enter after each of them.

ipconfig /release
ipconfig /all
ipconfig /flushdns
ipconfig /renew
netsh int ip set dns
netsh winsock reset

ERR_CACHE_MISS: cache commands

Conclusion

The ‘ERR_CACHE_MISS’ error message in Google Chrome might appear for a variety of reasons. Whether the problem is caused by faulty extensions, obsolete browser or network settings, or a temporary connection issue, the good news is that you can solve it with a few simple steps.

How to Fix the WordPress Not Sending Emails Issue

Let’s talk about why your WordPress not sending emails today.

One of the most common problems faced by WordPress users is the inability of the platform to send emails. You may have observed that you are not receiving email notifications as usual, or you may have heard from your readers or customers.

Also, you may have correctly installed a contact plugin such as Contact Form 7 but then noticed that emails from this source are not being sent. Email issues like this can be pretty aggravating.

There are a few possibilities for why WordPress isn’t delivering emails to you. These are some of them:

  1. Due to the Contact form plugin, WordPress is unable to send emails.
  2. Problems with third-party plugins
  3. Emails are going to the spam folder
  4. Server Configuration Error

How to Prevent Email From Being Sent to Spam and causing WordPress not sending email errors?

Using Simple Mail Transfer Protocol (SMTP) instead of PHP mail is one approach to keep your emails out of the spam folder (). This protocol is the gold standard in the industry and employs adequate authentication.

Simply put, emails sent using SMTP are more likely to be delivered than emails sent via other protocols. To set up your WordPress site for sending the emails over SMTP, you have a few options.

Ways to fix WordPress Not Sending Emails issue:

Fix 1: Add the Email Address to the Whitelist

If your emails are being marked as spam, you can urge your users to whitelist them by adding your email address to their contacts list.

If the Email is relocated to the inbox in Gmail, it should mean that future emails from that address will not be sent to spam, although adding the address to contacts is the safest option.

Fix 2: Use a more secure email address.

You should also check the email address from which your website sends emails. This will be your admin email address by default. If the email address is info@, contact@, sales@, or something similar, email providers may mistake it for spam.

Change the email address to something more professional-looking, and make sure that any emails received to that address are forwarded to your regular address, so you don’t miss any responses. Create an alias for your email address to accomplish this.

Fix 3: Sending Email using GMAIL SMTP Plugins

To begin the installation process, navigate to your WordPress admin dashboard and select Plugins > Add new from the drop-down menu.

WordPress Not Sending Emails: plugin add new

After entering the plugin area, type the plugin name “Gmail SMTP” into the search box and press enter. As the plugin appears in the search results, click the Install button followed by activating it.

smtp

After you’ve completed the installation and activation steps, go to the installed plugins section and click settings.

To get started with the Gmail Authorization plugin, you must first send emails via it and make it operate. Next, create an API key for a Google web service. However, while this may appear somewhat technical, you do not need to be concerned; follow the simple procedures outlined below, and your job will be completed.

To begin, go to the Google Apps creation page and log in with your Gmail account. And then proceed as follows:

WordPress Not Sending Emails: google API

Step 1: Click “Go to credentials” to continue the process.

google API

Step 2: Select “user data” to access on the credentials page, with the API configured to “Gmail API,” “Web browser (javascript), and “user data.”

add credentials

Step 3: After selecting the option stating “What credentials do I require?” A page with credentials will appear. Next, you have to enter your Authorization client. Then, under the “Authorized JavaScript sources” area, type in your website’s URL.

Step 4: To complete the Authorized redirect URL, go to your Gmail SMTP settings and copy the entire link into the Authorized redirect URLs area.

Step 5: Following your click on “Create ID,” the following step is to fill up the email address field with the email address you’ll be using. After that, fill in the product name. After that, you can call your product whatever you like, such as Gmail SMTP sender.

WordPress Not Sending Emails: create client id

Step 6: After you’ve completed all of the required fields, click Continue. The last page will display a download option for credentials. Click the “Done” button after you’re finished with the configuration.

Fix 4: Checking whether WordPress isn’t delivering emails after installing the Gmail SMTP plugin.

Once you’ve completed the API key generating process, to determine whether or not the configuration has been completed appropriately, open the credentials in the Google API and click on the Name of the credential you just created. Now follow the mentioned steps:

Step 1: After clicking on the credential’s Name, a page called “Client Id for Web Application” will emerge. You’ll see Client ID and Client Secret on that page, which you’ll need to fill in the Plugin settings.

WordPress Not Sending Emails: client id for web

Step 2: Open the Gmail SMTP settings page and copy both the Client ID and Client secret.

  • All mandatory fields, such as “OAuth Email address,” must be filled in.
  • Paste the Client ID and Client secret into the appropriate fields.
  • Fill in the “From Email Address” field with the email address that will be used as the sender’s form address.
  • Enter the “From name,” that is, the Name that will be used as the From Name in an email.
  • Select “TLS” as the encryption type.
  • Now type 587 in the SMTP port field.

Step 3: When you click the “Save Changes” button, a pop-up box with the words “Grant Permission” will display. To continue, click it, and a permission page will appear.

WordPress Not Sending Emails: client id grant permission

Step 4: Select “Allow” from the drop-down menu. The page will then be sent back to the plugin settings page with the message “Access given successfully.” The SMTP Status will indicate “Connected” with a green light.

Conclusion

WordPress doesn’t consistently deliver emails, and you could be stumped as to why. This issue, which is one of the most common WordPress issues, can occur because emails are going to spam, your server isn’t set up to deliver emails, or your contact form settings need to be changed. Follow the steps above to figure out why your WordPress site isn’t sending emails and how to fix it.

9 Best Essential Tools for Site Owners (No.3 & 5 are Spy Tools)

Do you have a website? Are you looking for tools for your website which can make your day-to-day tasks more efficient?

You have landed on the right page!

In this post, we will talk about eight amazingly useful and effective tools for websites that every website owner should have.

You can boost your day to day activities and can improve your long term productivity with the help of these super useful tools!

5 Best Magento Hosting Providers (Number #1 is Just Excellent)

For those of you who haven’t heard of Magento, this is an open source e-commerce platform.

Over the years this has been segregated as Magento Opensource or Community edition platform and Magento commerce which is an Enterprise edition platform.

Did you know, Magento can be alternatively used instead of WordPress for online store creation.

In most cases, WordPress along with WooCommerce is used for online store creation. This can simply be done using Magento hosting.

Both of these being equally powerful platforms, let me walk you through the actual differences between them.

How to Fix the “This Site Can’t Be Reached” Error (8 Easy Fixes)

“This Site Can’t Be Reached:” – Introduction

While browsing the web, “This site cannot be accessed” error is quite frequent in Chrome.

Although there are various other errors too that stop you from accessing any website, including 403 Forbidden Error, err_connection_refused, etc. Although this issue has been reported by many Chrome browser users, it is not clear how to solve it. This error can occur in Chrome browsers in a variety of settings.

This Site Can’t Be Reached: Error Message

In general, the problem occurs when the DNS lookup fails. Website names are translated into internet addresses using DNS, a network address.

The most common result is a lack of internet connectivity or incorrectly configured internet and network settings. Firewalls can also prohibit Google Chrome from loading the webpage.

Here are the most popular and effective fixes to resolve the error instantly.

Ways to fix “This Site Can’t Be Reached: ” error:

Fix 1: Clear your browser’s cache, history, and cookies before continuing.

This error “This site can’t be reached” can be instantly solved after clearing your browser’s stored data. Here are the steps to help perform it easily:

Step 1: Activate the Chrome web browser.

Step 2: More can be accessed by clicking the More icon at the top right of the screen.

Step 3: To clear browsing data, choose “More tools” and then “Clear browsing data”.

Step 4: Choose a time range at the top. Select All time to erase everything.

Step 5: Check the boxes visible to you for clearing the data as desired

Step 6: Click on Clear data stating option.

Reached-image6

Fix 2: Resetting the Chrome settings.

If you’re using Chrome, you may reset your browser’s settings with a single click. Doing so will clear Chrome’s configuration information, including your home page and tab settings, saved form data and browsing history, as well as cookies and other tracking information.

Step 1: Activate the Chrome web browser.

Step 2: More can be accessed by clicking the More icon at the top right of the screen.

Step 3: Choose Settings from the menu.

Step 4: Toward the bottom of the page, click on “Advanced.”

Step 5: Click Reset Settings under the option stating reset and cleanup.

Reached-image8

Fix 3: Resetting the WiFi modem

Wi-Fi modems can be reset manually. Reset your router as well, if you have one.

Step 1: Unplug the power cord from the WiFi router and the router will shut down.

Step 2: Ten to fifteen seconds of holding down the reset button is all it takes to reset.

Reached-image8

Step 3: As soon as the modem starts flickering, release the reset button and the modem will reboot.

Step 4: Please wait between three to five minutes for the Internet light to turn green.

Step 5: Try to connect to the Internet and see if it works.

To reset your modem, you may be asked for account details.

Fix 4: Restarting the DNS Client.

Follow the steps as mentioned below to restart the DNS client of your system:

Step 1: Press the Windows “Start” menu button, click “Run.”

Step 2: Using the text field, type “cmd” and hit “Enter.”

This Site Can’t Be Reached: Command Prompt

Step 3: Your Windows Command Prompt will now be launched.

Step 4: Stop the service by typing net stop dnscache.

Step 5: Stopping the DNS service may take a few seconds.

Step 6: Using the command prompt, enter the command net start dnscache.

Step 7: The DNS service on the machine is restarted as a result.

Reached-image3

Step 8: Run the following command to clear the DNS cache: ipconfig /flushdns.

Step 9: “Successfully flushed the DNS Resolver Cache” should appear if everything went fine.

Fix 5: Disabling the Experimental QUIC protocol flag.

QUIC’s goal is to create better internet transport than TCP. Clients can overcome transparent proxies via QUIC, which uses UDP port 80 and port 443 and is widely used to bypass UTM features such as web filtering that may not function properly in Google Chrome but work flawlessly in other browsers such as Internet Explorer or Mozilla Firefox.

The QUIC protocol can be disabled in Google Chrome by following the given below steps:

Step 1: Type in chrome://flags/ in the address bar to open Chrome.

Step 2: Search for Experimental QUIC protocol.

This Site Can’t Be Reached: Chrome Experiments

Step 3: Select Disabled from the drop-down selection menu.

Step 4: Google Chrome must be restarted for the modifications to take effect.

Fix 6: Changing the TLS version’s maximum allowed limit.

It’s also conceivable that the web server’s TLS version is old. Security Protocol for Computer Networks (TLS) Transport Layer Security is a cryptographic protocol for safe communication over a computer network TLS 1.2 is the current version, and TLS 1.3 is the final version.

Step 1: Type in chrome://flags/ in the address bar to open Chrome.

Step 2: The maximum TLS version enabled is to be searched.

This Site Can’t Be Reached: Chrome Flags

Step 3: As before, select the default version 1.3.

Step 4: Google Chrome must be restarted for the modifications to take effect.

Fix 7: Removing Chrome’s Browser Extensions.

Almost all browsers support the use of extensions, which are small programs that extend a browser’s functionality. Network connections can be disrupted by some browser extensions, according to reports.

Step 1: Activate the Chrome web browser.

Step 2: More can be accessed by clicking the More icon at the top right of the screen.

Step 3: From the menu, choose More tools.

Step 4: Click on Extensions in the left-hand menu.

Step 5: Disable the extensions one by one by dragging the blue slider to the right.

This Site Can’t Be Reached: Chrome Extensions

Step 6: Check to see if a browser extension is causing the error and delete it if it is.

Fix 8: Resetting TCP/IP.

Here is how you can reset your TCP/IP settings:

Step 1: Open the command prompt or Windows PowerShell as administrator.

Step 2: Type netsh int ip reset in the Command Prompt and then press Enter on your keyboard.

This Site Can’t Be Reached: Windows PowerShell

Step 3: Wait for the Command Prompt to run through the TCP/IP reset before attempting to connect to the internet again.

Step 4: Test the webpage again after restarting your computer.

Conclusion

Even though any error hindering your access to any website is always very annoying, it can be resolved easily using the right procedure. If you follow the given steps sequentially, you will be able to instantly eradicate the error and get the best-ever website performance.

How to Fix the “SSL Handshake Failed” Error

Today we will talk about SSL Handshake Failed Error and ways to fixing it.

Secure Sockets Layer is the SSL acronym. It is a previous version of the secure data transfer protocol. Several SSL versions have been regularly developed (1.0, 2.0, 3.0). TLS is the safety layer of transport. It is based on the latest SSL 3.0 requirements and has its new protocol sequence (1.0, 1.1, 1.2).

The first releases were slower. The protocols function in the same manner and are not drastically different. Simultaneously and even on the same server, different versions may be used. Any discrepancy in SSL may cause various SSL connection errors,
including SSL_ERROR_NO_CYPHER_OVERLAP and SSL Handshake Failed Error.

Handshake SSL/TLS is a process in which a client and server strive to agree and initiate communication via the SSL/TLS encrypted data security tunnel. Meeting a client and a server for the first time, a common secret key is generated with encryption.

A browser turns a card number into a random symbol set and only then sends the number to the server if a secure connection is established. With the use of a specific key, the receiving party encrypts the message.

If cybercriminals can intercept the information, they will receive a set of symbols only and won’t understand anything. SSL/ TLS handshakes are also helpful in establishing the authenticity of a client and server.

For instance, a client can be sure that a server that renders information about a bank account is a bank server. The purpose of SSL/ TLS handshake is the protection of privacy and information confidentiality over the internet.

Comprehension of what causes SSL to fail

An SSL handshake or an error of 525 would prevent the server and browser from connecting safely. For several reasons, this can happen. Generally speaking, an Error 525 signifies the SSL grip between a Cloudflare domain and the webserver originating from it failed.

ssl handshake1

It is crucial to be aware, however, that SSL problems on the client or the server side can occur. Common reasons for client-side SSL issues include.

  • False user device date or time.
  • A configuration fault of the browser.
  • A link that a third party intercepts.
  • a client protocol that is not server-supported.
  • Incomplete, invalid or expired certificate.

If the SSL handshake fails, anything incorrect with the website or server and its SSL setup may typically be ascribed to the problem.

How to correct failed mistakes in TLS handshake?

To exchange data, a client and a server have to agree on connection settings such as an update of the protocol, verify the authenticity of certificates, mode of data transfer, etc. This is a multi-level process that is difficult. The handshake of SSL/TLS, therefore, failed if one of its levels was unsuccessful.

When you question how to resolve a failed TLS error, the actual causes of the error must be identified and these issues can take place at the server end.

Fortunately, you may utilize a few strategies to start researching and solving potential problems one by one.

Fix 1: Updating the time and date of your system.

This may stop the SSL handshake if your machine is using the incorrect date and time. When the system clock is different from the current time, for example, it may interfere with the verification of the SSL certificate if it is set too far in the future.

Your computer clock may be wrong because of human error or just because of a breakdown in your settings. Anyway, it’s a good idea to inspect the proper time and update it if it doesn’t. your system time is correct. Here is how you can correct the date and time of your system:

Step 1: Click on the bottom right corner of the system where the time and date is visible.

Step 2: Go to change date and time settings and then correct the settings.

ssl handshake4

Naturally, you may infer that this is not the root of the “SSL Handshake Failed” issue if your clock shows the right information.

Fix 2: Updating the web browser.

You need to maintain your operating system and applications up to current at all times. Along with ‘SSL handshake failure,’ this alone can prevent numerous issues.

Step 1: By launching the Chrome browser, Chrome users may see that by clicking on the top right corner, three vertical points are visible.

Step 2: Click on ‘Settings’ and you will find the ‘About Chrome’ option in the left menu section, here you can see if your Chrome browser needs an upgrade. It just means your browser is up-to-date if you do not.

ssl handshake2

Fix 3: Checking SSL certificate’s validity

SSL certificates provide expiry dates to ensure that the validation data are accurate. The validity of these certificates often lasts from six months to two years.

The browser will identify this and be unable to complete the handshake SSL if an SSL certificate is revoked or expires. It could be time to reissue your SSL Certificate if it is over a year or so since you have put it on your website.

You can use an SSL certificate checking tool , to view the status of your SSL certificate. This tool is dependable and usable free of charge. All you have to do is enter the hostname section with your domain name and click on Submission. Once the checker is finished, it will provide you some results when you analyze your SSL configuration.

You may find on this website if your certificate is still valid and see if for any reason it was revoked. The handshake error should be resolved by updating your SSL certificate.

Fix 4: Configuring the browser for supporting the latest SSL or TLS protocols.

The best way to uncover the root cause of a problem is sometimes through the elimination process. As we have already indicated, a browser configuration can often result in SSL handshake failure.

The simplest way to establish if the problem is for a specific browser is to try to switch to another. At least this can help to alleviate the situation. You can also try to deactivate any plugins and reset to the default settings of your browser.

A protocol malfunction is also a possible browser-related problem. There’s no mutually supported protocol available, for example, if your server only supports TLS 1.2, but the browser is configured only for TLS 1.0 or TLS 1.1.

This leads to a manual SSL failure.

How you can verify if this issue occurs depends on the browser you use. As an example, we will examine how Chrome works.

Step 1: First, go to Settings>Advanced and open your browser. The number of menu options is expanded.

Step 2: Click Open your computer’s proxy settings under the System section.

SSL Handshake Failed: Chrome Settings

Step 3: A new window will be opened. Choose the Advanced tab next. See the box next to Use TLS 1.2 under the security area. Select TLS 1.2. Check the option if not.

Step 4: You should also uncheck the SSL 2.0 and SSL 3.0 boxes.

Step 5: The same goes for TLS 1.0 and TLS 1.1 as they are gradually eliminated. Once completed, click the OK button and verify that you have resolved a handshake mistake.

SSL Handshake Failed: Internet Properties Settings

Note that there is not an option to enable or disable SSL protocols if you are using Apple Safari or Mac OS. By default, TLS 1.2 is activated automatically. You can see the Red Hat Guide about TLS hardening while you are running Linux.

Fix 5: Verifying that the server is configured properly for supporting SNI.

It is also possible that an unsatisfactory server name indicator (SNI) setting is causing the SSL handshake failure. SNI permits the secure hosting of multiple TLS certificates for one IP address on a web server.

There is a private certificate on each website on a server. If the server is not SNI, it could cause an SSL handshake failed since the server cannot tell which certificate to present. This is not possible.

Some means of checking and seeing if a site is SNI necessary. One alternative is to take the SSL Server Test that we covered in the last section. Enter the domain name of your site and click Submit.

Search for a warning on the results page that reads “This website only works for SNI browsers”:

The ‘client hello message is another method for identifying if a server is using SNI. This is a more technical procedure yet a lot of information can be provided.

It entails checking for a ‘server name’ field in the extended hello header to see whether correct certificates have been submitted.

You might find this way preferable if you are comfortable with the use of tools such as OpenSSL and Wireshark. With and without the -server name option, you can use openssl s client:

# without SNI

$ openssl s_client –connect host:port

# use SNI

$ openssl s_client –connect host:port –servername host

It signifies that SNI is supported and appropriately configured for two separate certificates with the same name.

However, where there is a different output in the returned certificates or it is not possible to establish a call, an SSL connection without SNI, the call indicates the requirement for SNI but is not properly set up. This can require switching to a special IP address to resolve this problem.

Conclusion

These were some of the most successful SSL handshake solutions that might be made because of the browser or system settings. In most situations, the problem is solved by fixing the time and date settings or removing from the browser the problem causing extensions.

For server-related concerns, the issue of ‘SSL handshake failed’ can be resolved solely by the Website owner or administrator. Some typical server-side concerns are an invalid SSL certificate, a freely available SSL certificate, and an erroneous SSL Certificate Installation.

You should contact the owner or administrator of the website in that situation to make an effective decision.

How to Fix Cloudflare’s “Error 520: Web Server Is Returning an Unknown Error”

What is Error 520?

A common mistake causing an empty or unexpected response to the original server is the Cloudflare 520 error. This is especially true that a resource-intensive procedure prevents the server from sending a prompt answer.

There are various other 5XX errors too, including the 502 bad gateway error, but they are highly different from one another in many ways.

 err 5207

When an empty, unknown or unexpected Cloudflare response is returned from the source server, the Cloudflare error 520 triggers. When more resources than a program, cron job, or resource are required, the Server may not be able to answer all requests correctly.

This produces the following: “Error 520: Web server is returning an unknown error.”

This mistake could be justified by:

  • The web server application source crashes: The web server application crash at the server source is one of the main causes of this problem. The most likely reason for this is the running of a resource-intensive script. As a consequence, the server cannot reply in a timely manner to requests.
  • No Cloudflare IPs allowed at the origin: the firewall of the original server may present an impediment when connecting to a non-whitelisted IP address. Therefore, if the IP address of Cloudflare is not whitelisted, the 529 error can occur.
  • The origin of the TCP idle web server takes less than 300 seconds: A network connection is set up and maintained through the TCP protocol. The unknown error can be caused if its timeout value is too low.
  • Headers above the header size limit of Cloudflare (8kb): The immense use of cookies or the use of large cookies increases headers’ size. Crossing the memory limit also causes other errors apart from 520 errors, including Since the header limit of Cloudflare exists at 8kb, the header cannot be processed.
  • Empty reply from a web server that lacks an HTTP status or reply body: this is usually done when the domain DNS points to a faulty server.

Fixing the 520 Error:

Here are the most effective steps that you must follow in order to resolve this error.

Fix 1: Disabling the Cloudflare.

Cloudflare must be disabled before you start troubleshooting. This helps isolate the problem by verifying that the problem is recreated without a factor in Cloudflare.

Step 1: Log in to Cloudflare to start. Find and click on your website on the list.

err 5209

Step 2: Next, pick the DNS tab, then click the Proxy Status section on the Orange Cloud. You’re going to know that Cloudflare was off as the visible cloud became grey.

err 5206

Fix 2: Pausing the Cloudflare.

After logging in, you can also choose to pause Cloudflare.

Step 1: From the list, select your connected site.

Step 2: Then, in the sidebar, scroll down until you see the Advanced Actions area. To stop Cloudflare from running on your site, click the Stop Cloudflare on the Site link.

err 5201

Step 3: On the website, you’ll see a pop-up asking you to confirm that you wish to pause Cloudflare. Don’t hesitate to click the Confirm button.

err 5204

Fix 3: Getting into the development mode.

You can keep Cloudflare running but put it in development mode if you don’t want to pause or disable it. This will allow you to troubleshoot error 520.

Step 1: Click the Caching tab towards the top of the screen after login into Cloudflare.

Error 520: Cloudflare caching

Step 2: After that, scroll down to the Development Mode area and flip the Off switch. “On” should now appear.

err 5202

Fix 4: Checking the Error logs of the server.

You can troubleshoot error 520 by inspecting your server’s error logs now that you’ve deactivated, paused, or put Cloudflare into development mode.

If you’re unsure where to find your error logs, contact your web host provider. You can utilize the procedures below if your hosting provider uses cPanel.

Step 1: Go to the Metrics area of the dashboard after logging into cPanel. Then select Errors from the drop-down menu.

Step 2: The error log page shows errors in reverse chronological order, the most recent 300 messages. If you or your host changed the settings, the error log may show more errors.

Error 520

Fix 5: Generating a HAR File.

An HTTP archive file is known as a HAR. It keeps track of requests that go to the origin server as well as requests that travel through Cloudflare.

Because it compares response headers from the origin server and Cloudflare when it’s used as a proxy, it can aid debugging. It’s also used to check if the headers are too large, which could be the cause of error 520. The methods below will show you how to produce a HAR file using your browser:

Step 1: Right-click on the page in your browser. Then choose Inspect.

Step 2: After the panel has opened, go to the Network tab and look for a red circle button on the upper left-hand side of the screen. Click it if it’s grey.

Error 520

Step 3: Click the clear button after checking the Preserve log option next to the record button.Step 4: Reload the page that is causing the 520 problems. Then right-click anywhere in the Chrome developer tool’s messages section.Step 5: Save the file on your computer by selecting Save as HAR with Content.

Fix 6: The final step, if everything mentioned above has failed.

Contact Cloudflare support if you’re still having problems and wait for them to help you resolve the error. Give them the following information:

Step 1: When the error occurred, provide the full URL(s) to the support team.

Step 2: The Ray ID of Cloudflare from the website where the error 520 messages appeared.

Error 520 – Conclusion:

Because it’s a Cloudflare issue, the 520 error can be perplexing. However, it has to do with a server problem that prevents Cloudflare from connecting. The solutions to the most prevalent causes of error 520 are listed above.

If you’re still having problems after attempting these steps, you should contact your web hosting provider for further help.

5 Best Carrd Alternatives (More Powerful & Reliable)

The need for Carrd Alternatives

Carrd websites are the wonder of modern web design. An entire database of images, icons, forms, animations, and widgets layered into one cohesive webpage. That too, without the need for any subdomains. It’s a website builder with a lot of potential for many people.

But, Carrd isn’t perfect. There are issues. Issues that don’t break it but hurt it to an extent.

Reasons like…

  • Being what’s sold, there’s not much left after you build that one page
  • Great for building e-resumes, catalogs, galleries, portfolios, not so much for blogs
  • Difficult to get eCommerce sorted, especially for payment gateways

There’s only so much you can get done with one page. Blogs aren’t singular displays of content. They need a lot of room to segregate and occupy their space. Carrd seems like it could be great for an eStore but guess what? It lacks essential eCommerce features.

Fortunately, Carrd alternatives exist and come in more desirable features. With enough research, we locked on to 6 of the best Carrd alternatives. They don’t share Carrd.co’s design philosophy, but rather stand on their own.

In a hurry? Here’s our quick verdict –

  • The Best: Wix is a perfect balance between customization and functionality. Along with many templates, advanced design tools, SEO features, and much more
  • The Second Best: WebFlow is all about customization. Getting you in touch with the nitty-gritty aspects of web design; there’s nothing as modular in the market
  • The All-Rounder: Site123 is a beginner’s haven. A completely drag-n-drop website building experience without letting go of too much functionality

1: Site123

Carrd Alternatives: site123

A little bit about Site123

Site123 got their name from the way you create websites on their platform. Select a website template (or customize), upload your site content, and get your website online right away. Site123 has a noble focus on eStore ventures like niche products, arts/crafts, dropshipping, etc.

Site123’s website builder is charmingly easy to use. You’ll never see a line of code in the entire process. The templates are plenty albeit a bit lighter on the quality side. There are options to customize every inch of your website and you can talk to them if you ever feel lost 24/7.

Features

  • Intuitive drag-n-drop website builder that can work for every kind of user
  • SEO tools by Google for better rankings
  • Responsive web design for every device platform
  • Great eStore ideas including checkout & payment gateways
  • Custom web hosting & domain services for a complete experience

Why choose Site123 over Carrd?

Where Carrd limits itself to a singular website model, Site123 allows for a full website building experience at the cost of half. Not to mention, advanced eCommerce options for a better trading experience. You can even replicate a lot of Carrd’s design with Site123, without the preliminary restrictions.

Pricing

  • Free – 250 MB Storage, 250 MB Bandwidth, and a Subdomain
  • Premium – Free Domain for 1 year, 10GB storage, 5GB bandwidth, Remove SITE123 Floating Tag, Connect Your Domain, and advanced eCommerce features for 5.80/month.

Carrd Alternatives No.2: WebFlow

Carrd Alternatives: webflow

A Little Bit About WebFlow

Where Site123 is as simple as possible, WebFlow offers more & better customization. It’s UI replicates the feel of adobe products. If you’re going to be as unique as possible, WebFlow’s tools can let you get very deep.

WebFlow isn’t a ‘one package for everything’ deal. The services are divided into 3 sections for Building, Launching, and Growth. There are elegant templates for all purposes but are mostly paid. If you need a technical grip over your web building process and less handholding, WebFlow could be your dream come true.

Features

  • A unique website builder with tools like code export & object layering
  • Custom built-in SEO tools that give you more control like auto XML sitemaps, 301 redirects, etc.
  • Seamless integration with a variety of marketing & organization tools for collaboration
  • Hosting servers running on the Amazon Infrastructure with a 99.9% uptime SLA
  • Less to no maintenance to be patched, updated, or fixed

Why choose WebFlow over Carrd?

WebFlow’s website builder is a top-of-the-line creative platform that offers the power of intricate customization into your hands. It looks difficult to master, yet the customizations are primed to carve a unique website with a staging area for different devices. Also, great on-site documentation to learn and explore the service properly over Carrd’s nonchalant hand holding.

Pricing

  • Basic – Custom domain, 100 pages, 25,000 visits/month, 100 forms/month, and 50 GB CDN bandwidth for $12/month
  • CMS – Custom domain, 100 pages, 100,000 visits/month, 2,000 collection items, 1,000 form submissions/month, and 200 GB CDN bandwidth for $16/month
  • Business – Custom domain, 100 pages, 500,000 visits/month, 10,000 collection items, 2,000/moth form submissions, global CDN, and 400 GB CDN bandwidth for $36/month
  • Enterprise – A completely customizable plan for your enterprise

Carrd Alternatives No.3: Wix

Carrd Alternatives: wix

A little bit about Wix

There’s a good chance you might’ve heard about Wix. Wix taunts itself as more of an eBusiness solution, rather than a one & done website builder. Most of Wix’s products are homemade which means you get everything at a single cost. If anything goes wrong, they know how to fix it.

Building a free website is great in the short term. But if you want to really get into Wix, their website builder is where it is at. It is very minimalist, not overdone with features. Yet produces the most elegant websites, paralleling their templates.

Features

  • Fancy website builder with a minimalist UI yet packs a punch for functionality
  • A great template database with choices for blogs, online store, portfolio, fashion, art, etc.
  • In-built SEO & marketing tools that push rankings on every search engine query
  • Advanced tools like photo design & logo maker to get more creative power
  • eCommerce ready with all the cart checkout options and billing gateways

Why choose Wix over Carrd?

Wix’s entire philosophy is to let you get as creative as possible while realizing your business ideas to their full potential. You can make so much with so much on Wix’s multispecialty platform against Carrd’s one-size-fits-all solutions. Also, they have web experts on call to give you some credible advice on your website-building journey.

Pricing

  • Business VIP – Unlimited bandwidth, 50 GB storage, Google analytics, unlimited video hours, and a free domain for 1 year for $35/month
  • Business Unlimited – Unlimited bandwidth, 35 GB storage, 10 video hours, Google analytics, and a free domain for 1 year for $25/month
  • Business Basic – Unlimited bandwidth, 20 GB storage, 5 video hours, Google analytics, and a free domain for 1 year for $20/month

Carrd Alternatives No.4: Squarespace

square space

A little bit about Squarespace

Twin competitor to Wix with extensive social media campaigns on Youtube. Squarespace is the stylish cousin to Wix’s garishness in website design. Where Wix goes over the fence with features, Squarespace gives you enough to be attractive as well as functional.

While there are many comparisons to draw, Squarespace has made its space among the new-age entrepreneurs. Squarespace’s workflow is more of a – get a template – edit to your liking – add content. Squarespace isn’t as much of a website ‘builder’ as a website ‘editor’.

Features

  • Squarespace’s intricate templates are designed to work out of the box and need minimal tweaking to get it to your vision
  • Mobile app support for iOS & Android to tweak your website whenever wherever
  • Apps & tools support platforms like Dropbox, Youtube, Instagram, Google maps, etc.
  • Custom dashboard & analytics to track traffic spikes, sales numbers, expenses, page views, and much more
  • Custom SEO & blogging tools that can make your site stand apart

Why choose Squarespace over Carrd?

Squarespace likes to match the entrepreneurial vibe of Carrd. But beats it with more styling options like colors, animations, layout options, etc. What many users find helpful is their dedication to the user. They provide services from official experts to help you figure things out. Not to mention, a plethora of tools that do more with less.

Pricing

  • Personal – Free custom domain, SSL security, unlimited bandwidth/storage, SEO features, access to the entire portfolio gallery, 2 contributors, 24/7 customer support for $12/month
  • Business – Free custom domain, SSL security, unlimited bandwidth/storage, SEO features, access to the entire portfolio gallery, unlimited contributors, 24/7 customer support for $18/month
  • Basic Commerce – Free custom domain, SSL security, unlimited bandwidth/storage, SEO features, access to the entire portfolio gallery, unlimited contributors, 24/7 customer support for $26/month
  • Advanced Commerce – Free custom domain, SSL security, unlimited bandwidth/storage, SEO features, access to the entire portfolio gallery, unlimited contributors, 24/7 customer support for $40/month

Carrd Alternatives No.5: Strikingly

strinking

A little bit about Strikingly

Besides having an adverb for a name, Strikingly is the closest you can get for a Carrd.co identical. Strikingly nails the one-page layout design for both desktop and mobile devices in a few minutes. Their templates are nothing fancy but stay easy on the eyes and to the point.

Strikingly is ideal for creating personal, small business, or small eCommerce websites. No coding knowledge required, just your creativity. You’ll get easy-to-use custom templates where you can upload & replace your content. It’s powered by an intuitive drag-n-drop website builder tool.

Features

  • Great for creating singular-layout websites (multi-page too) without the hefty cost
  • Responsive design method that works flawlessly on mobile platforms
  • Built-in eCommerce & analytical tools to track site performance
  • Option to display social feed right into your core website
  • Advanced design options include favicons on browser tabs

Why choose Strikingly over Carrd?

In many ways, Strikingly is like Carrd but with the addition to be scalable into a full-fledged experience. Other than that, Strikingly makes for a much better designing option overall. A simple drag-n-drop builder action to populate an empty template with your content.

Pricing

  • Free Plan – Unlimited free sites, Strikingly.com Domain, 5 GB monthly bandwidth, 500 MB total storage per site, simple store – 1 product per site, invite collaborators, 24/7 support
  • Limited – Unlimited free sites, 2 Limited sites, free SSL for custom domain, free domain for a year, 1 GB storage per site, 50 GB bandwidth, sell up to 5 products, 24/7 chat support for $8/month
  • Pro – 3 Pro sites, unlimited free sites, connect a custom domain, free SSL for a custom domain, free domain for a year, 3 GB storage per site, unlimited bandwidth, sell up to 300 products, 24/7 chat support for $16/month
  • VIP – Power features for businesses & membership sites, 5 VIP sites, everything in the Pro plan, 10 GB storage per site, unlimited bandwidth, sell up to 500 products, 24/7 chat & phone support for $49/month

Carrd Alternatives No.7: Weebly

weebly

A little bit about Weebly

Comes at a close second to Wix in functionality and lies around Site123 for the website builder UI. Weebly is easy to use, a drag-n-drop website builder. Here you build your site exactly as you see it on-screen without the need to divulge in code or backend access.

Weebly has a huge app store. Like many website builders out there, it comes packed with built-in features to help you build and grow the website as you like. Yet, Weebly stays a bit limited in terms of customization, which keeps it in the favor of beginners.

Features

  • Simple-to-use website builder with easy access to uploading or removing content
  • A huge app center including third-party ones and a few of Weebly’s own
  • Great collaboration tools with your team, so you can divide tasks accordingly
  • Limited but competent theme collection that is responsive with every device platform
  • ‘Promote’ newsletter tool to stretch out your marketing moves

Why choose Weebly over Carrd?

Weebly is the choice for people looking for the most accessible eCommerce platform and access to tons of app extensions that Carrd sorely lacks.

Pricing

  • Free – Free SSL security, 500 MB storage, domain with Weebly branding
  • Connect – Free SSL security, 500 MB storage, connect a custom domain for $5.00/month
  • Pro – Free SSL security, unlimited storage, connect a custom domain, remove Weebly ads, site search for $12/month
  • Business – Free SSL security, unlimited storage, connect a custom domain, remove Weebly ads, site search for $25/month

Conclusion

Carrd.co is a much minimal of a venture in comparison to the above competitors. Carrd obviously lacks a long list of functionality that could give it a major boost. However, maybe its appeal is in its simplicity and singular design model that a niche customer base enjoys.

But for many people, websites cannot simply be a gallery display. Less can sometimes be less.

So, for those that demand the feel of Carrd but disapprove of its limitations, there are plenty of Carrd alternatives in the market. Also, not to forget, they come with neat money-back time periods that let you explore them to the fullest extent before deciding.

Finally, do let us know which of the above alternatives piqued your interest the most in the comments down below!

Fix the HTTP 429 Too Many Requests Error (5 Easy Ways)

Have you received HTTP 429 Too Many Requests Error?, Well, it is because the user sent too many requests in a short period. The HTTP 429 Too Many Requests error message could be caused due to a plugin, a DDos, or something else. It’s a server requesting that you stop sending requests. Moreover, even though it might sound a lot similar to ERR_CONNECTION_TIMED_OUT, it is a lot different from it.

When a user agent attempts to access a given page too many times in a short period, your server may activate a rate-limiting function. When a user (or an attacker) tries to log into your site repeatedly, this is the most common error to occur.

err 429 2

Cookies, rather than login credentials, may be used by your server to identify users. Requests can also be counted on a per-request basis, across your entire server, or many servers. And these might also be the cause of 429 Too Many Requests Error.

Regardless of how the error appears, it always signifies the same thing: a user or a piece of code is sending too many requests to your server. It’s possible that the error will ultimately vanish on its own. You’ll need to be proactive in other cases, such as those caused by plugin issues or Denial of Service (DDoS) assaults, to address the error.

Fixing the HTTP 429 Too Many Request Error

The issue is that the 429 error frequently impacts your login page, making it impossible for you to access the dashboard of your website. Fixing it can be difficult because of this, but it is still possible if you know what to try. Here are the top 5 fixes which will help you resolve the error.

Fix 1: Waiting to send another request.

Waiting to send another request is the simplest technique to fix an HTTP 429 error. This status code is frequently accompanied by a “Retry-after” header, which indicates how long to wait before sending another request. It could only be a few seconds or minutes.

Fix 2: Clearing WordPress cache.

You may be able to access the WordPress website admin area even if the 429 Too Many Requests Error occurs. As a result, you must take advantage of this opportunity to correct the problem. The WordPress site cache can be deleted more easily. Here are the actions to follow to achieve the same result.

Step 1: Go to the WordPress dashboard and log in.

Step 2: Move to “WP Super Cache” after clicking “Settings.”

Step 3: After that, click the “Delete Cache” button to clear all of your site’s cache data.

err 429 4

If this doesn’t work, you’ll need to try the other options to fix the 429 Too Many Requests Error.

Fix 3: Disabling the plugins.

The 429 error can sometimes be caused by a malfunctioning plugin. The following plugins are the most known for producing errors:

  1. Plugins for security.
  2. Solutions that force your website to use HTTPS for loading.

These plugins may send an excessive number of requests to the server, exceeding its rate limit and resulting in a 429 error. Disabling all current plugins on your site is the quickest way to see if one is causing the problem.

Then, follow the given steps to do the same:

Step 1: Go to the WordPress Dashboard and select the Plugins section.

Step 2: Deactivate each plugin and check if it resolves the error.

err 429 1

If the error goes away, the 429 error was likely caused by a plugin. Try to use as few plugins as feasible in the future. Install only the plugins that are necessary for your site to perform properly, and then delete the rest.

Fix 4: Switching the WordPress’ default theme.

In some circumstances, error 429 is caused by your active WordPress theme. This is most likely the case with advanced themes that rely on API keys for authentication.

Assuming that you don’t have access to your WordPress dashboard to address this potential issue, still, you can disable your active theme with an FTP client. Here is the entire process of doing it:

Step 1: FTP access to your WordPress website is required.

Step 2: Go to the wp-content/themes folder.

Step 3: Find the folder that contains your active theme.

Step 4: Change the name of that folder to something else.

err 429 3

HTTP 429 Fix 5: Contacting the web host provider.

If you’ve tried removing your plugins and changing themes but still haven’t solved the 429 issues, it’s time to contact your hosting provider. It’s possible that your server, rather than your website, is to blame for the issue. Nothing you do on your end will assist if the problem is with the server.

It’s conceivable that your hosting provider has set a rate limit. Your host may be limiting requests from specific third-party services or platforms, such as bots, crawlers, search engines, or tools like Google Search Console, that make too many queries to your website.

Many bots, for example, can harm your site, particularly if they ignore your robots.txt file. Other crawlers, such as Google, are crucial. If this is the case with your server, double-check that bots and crawlers are properly limited. Even if your host doesn’t restrict third-party services, they can help you figure out what’s causing the problem.

Conclusion

An HTTP 429 Error is common, but it can be prevented by paying attention to rate constraints imposed by your server, API, plugin, or other third-party software. There are methods you can do to remedy a 429 error if you go above those restrictions.

It’s always aggravating to run into a mistake on your website. When it comes to errors, though, those with number codes at least provide you with enough information to begin correcting them. If you get the HTTP 429 Too Many Requests error, you know something is overloading your server with requests, therefore it’s only a matter of figuring out what’s causing the problem.

How to Fix a “This Site Can’t Provide a Secure Connection” Error When Using MAMP

There’s nothing like an error notice that stops your work – particularly if there is security. A note that reads, ‘This site can’t provide a secure connection’ may be misleading and scary. It also can be disruptive if you receive it on your MAMP installation since these pages often are locally tested.

This usually involves a web browser or the SSL certificate of your website. Luckily, it is rather easy to correct it. It could be as easy as emptying the cache from your browser.

First question that arises in mind is, what exactly is a “secure link?” It’s just an HTTPS rather than an HTTP link to a website. Most browsers show these sites in the address bar with a padlock icon, which shows that the link is safe. HTTPS offers significant security improvements compared with HTTP, but also severe compliance requirements. A valid SSL certificate is one of them.

A problem with the SSL certificate can cause various SSL connection errors, including the ‘This site can’t provide a secure connection’ error, SSL_ERROR_NO_CYPHER_OVERLAP, SSL Handshake Failed Error, etc.

In other words, the website claims to comply with HTTPS but does not supply or utilize an invalid certificate. The browser will not load the site and will display the error notice instead if the certificate can’t be confirmed.

Let us investigate the most common reasons for this notification of error:

  • There is no SSL certificate in your local environment. You probably don’t have a certificate for your website if you use a local environment like MAMP. This should be the initial step in resolving your problem since it probably is the reason for your problem.
  • The browser’s outdated SSL caches. This is one of the most prevalent reasons for the error. Web browsers, store SSL certificates in a cache, like other data. It means that every visit to a site that speeds up browsing does not require them to authenticate the certificate. However, it can create that issue if your SSL certificate changes and the browser still loads an earlier, cached version.
  • Setting your computer incorrect time and date. It can cause problems with the authentication of an SSL certificate if your computer is configured to the wrong date and time. Luckily, this has quite a simple solution.
  • Extensions to the browser. A browser extension that is not properly configured or malfunctioning can potentially cause authentication problems. This may be nefarious, but it is a simple code mistake most typically.
  • SSL certificate invalid or expires. This message can be seen if the SSL certificate of your website expires or is invalid. Certificates must be regularly renewed.

Fix 1: Clearing the browsing data, including cookies and cache.

Often SSL certificate difficulties are caused by browser cache and cookies. First, in your browser, it is recommended to clear cache and cookies, and you can do it as follows:

Step 1: Click on Ctrl+Shift+Delete
(or go to the chrome:/settings/clearBrowserData address) in Chrome

Step 2: Now choose the time period (all times) and click on the Clear data button.

clear data all time

Fix 2: Disabling the browser’s extensions.

It is also proposed that the third-party browser extensions, in particular anonymizers, proxies, VPNs, antivirus extensions, and other similar add-ons that could interfere with traffic on the destination website are discarded (deleted). To delete these extensions, you must follow the given steps:

Step 1: Click on three vertical menu dots from the top right corner and then go to More tools and click on Extensions.

Step 2: You can examine the list of enabled Chrome extensions or browse to chrome://extensions/. Disable any uncertain extensions.

chrome extensions

Fix 3: Checking the time and date settings of the device.

Wrong time or date on your machine, or time area, may also lead to secure HTTPS website connection issues. When the certificate has been created, when the certificate has expired, and when the certificate of the higher certificate authority has expired, your system checks the time and date during authentication.

Make sure you’ve set the right time and time zone. If not, follow the steps as specified below:

Step 1: Go to the date and time display on the system’s bottom right corner.

Step 2: Click on Change date and time settings and then alter the time zone if it is incorrect.

date n time

Fix 4: Disabling the QUIC protocol.

Ensure that QUIC support is enabled in Chrome (Quick UDP Internet Connections). QUIC makes it possible to establish the connection faster, and when you connect to a site, negotiates all TLS (HTTPS) settings. In some circumstances, however, SSL connections may have complications. Try deactivating QUIC by following the given steps:

Step 1: Type chrome://flags/#enable-quic on the chrome search bar

Step 2: Find the Experimental QUIC protocol option and then change its value from Default to Disabled

This Site Can’t Provide a Secure Connection: quic_protocol

Step 3: Now restart Chrome to make the changes applicable

Fix 5: Enabling the SSL and TLS protocol.

And lastly, TLS and SSL protocol support may be sufficient to remedy the problem. This is the most effective in most circumstances. Activating these protocols affects your internet security without contemplation hence you should not use this strategy unless otherwise.

When an SSL/TLS version is used previously, a user sees the secure connection error as the client/browser supports it. To enable the existing versions of the SSL / TLS protocol (remember that this is not safe), follow the steps mentioned below:

Step 1: Open the control panel and then move to the internet options


Step 2: Move on to the advanced tab and then enable TLS 1.2, TLS 1.1, and TLS 1.0 and if it is not sufficient then also enable SSL 2.0 and SSL 3.0.

Step 3: Restart the browser to see if the error vanishes or not.

If neither of these methods helped to eliminate the error “This site can’t provide a secure connection”, try the following:

Step 1: Go to C:\Windows\System32\drivers\etc\host and ensure that no static records are present there.

Step 2: Move to the control panel and then internet options and ensure that the internet zone’s security level is medium or medium-high. If you have previously selected as high, that might have been blocking several SSL connections for the browser.

This Site Can’t Provide a Secure Connection: internet security

Step 3: Now open the chrome browser again and then type (chrome://flags) in the search bar

Step 4: Search for TLS 1.3 parameter and then ensure that it is enabled or set to default.

Conclusion

The notice “This site cannot provide a safe connection” in MAMP not only prohibits your website from being accessed, but it may also be of concern for the security consequences. It’s typically benign and rather simple to correct, fortunately.

This mistake normally suggests either a configuration problem on your browser or an SSL certificate on your website (usually, it means that you don’t have one at all on localhost). You should be able to solve this mistake fast by following the preceding recommendations so that you may return to business.