How to Fix a 400 Bad Request Error: 7 Easy Fixes

Client-server interactions are usually frequent and seamless. Regardless, a 400 Bad Request error usually means that a request was not fulfilled correctly, or that the remote server to whom you sent your request was unable to interpret it because it had become damaged.

Because servers react to requests in a certain and typically predefined format, malformed requests might result in error messages. To add to the confusion, the server may occasionally produce the error, but only in a few cases. HTTP failures may seem different depending on the browser you’re using.

400 Bad Request Error Screenshot

To ensure trustworthy hosting services, website owners can modify their HTTP Error 400 page. When web servers utilise Microsoft Internet Information Services (IIS), for example, they display more specific errors like “400.3: Invalid If Header,” “400.2: Invalid Depth Header,” “400.1: Invalid Destination Header,” and so on. While 401 error has these variants, 401 error and 403 error are not its modified versions, and they represent Unauthorized and Forbidden errors respectively.

Top 7 Fixes for 400 Bad Request Error

A 400 Bad Request error can be caused by a variety of factors that aren’t always obvious. It’s difficult to remain unconcerned about an HTTP error that provides little information about the issue. However, there are only a few steps to resolving a 400 Bad Request issue. We’ve compiled a list of helpful hints to assist you in navigating your way out.

Fix 1: Rechecking the website URL.

Because a faulty URL is the most typical cause of the 400 Bad Request error, double-check your URL for any typos or syntax issues. Consider using an online URL encoder for long URLs, which will automatically detect non-ASCII or incorrect characters in a URL, saving you time and effort.

Fix 2: Restarting the system

Restart your computer system and any attached peripherals, such as routers. This is also another initial fix that you must try before you move on to other higher-end solutions. Probably, this one will fix the error and the website will start running back again. However, if the error persists, then move on to other techniques.

Fix 3: Compressing the file size that you tried uploading or try uploading any other smaller file.

You’ll get a 400 Bad Request error if you try to upload a file to a website that’s bigger than the server’s file size limit.

You can try it out by first uploading a smaller file. If this works, the original file was probably too huge, and you’ll need to find a way to shrink it before re-uploading it.

This can vary depending on the sort of item you’re trying to upload, however, numerous internet services can assist you with compressing huge photos, video, and audio files.

Fix 4: Checking the internet connection.

Check your internet connection or contact your internet service provider if you’re receiving a 400 Bad Request on practically every website you visit. Alternatively, you can also try to connect to some other network connection and then try to revisit the website to check if the previous connection was causing the error.

400 internet

Fix 5: Clearing the browser data, including the cache and cookies.

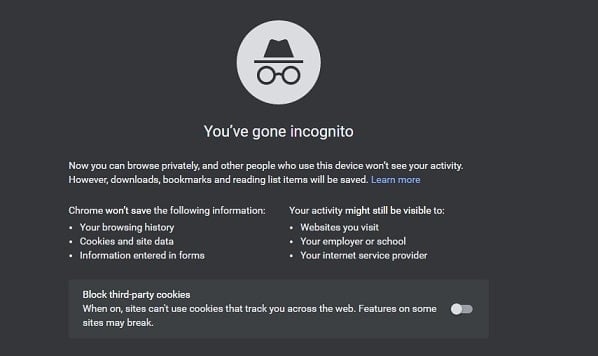
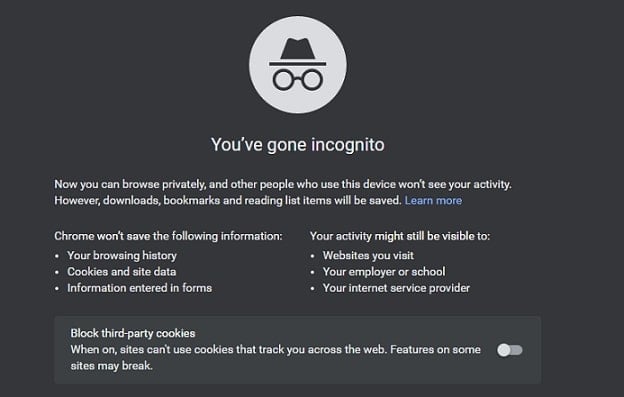
Due to obsolete or corrupt cookies, a website may fail to comply with your request. To see if they’re the source of the problem, open your website in incognito mode. Here’s how you can do it:

Step 1: Select the three dots in the top right corner of the browser.

SStep 2: From the opening menu, select ‘New incognito window.’

400 incognito

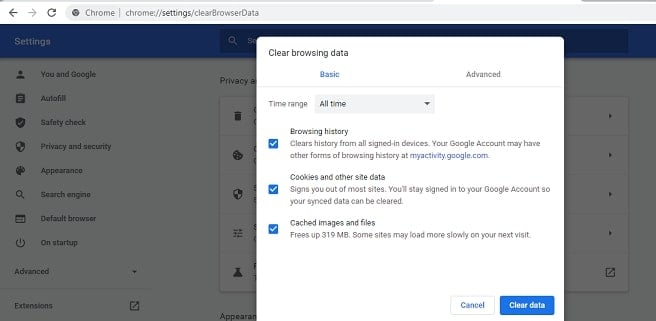
If the error goes away, it means the 400 Bad Request error was caused by the browser’s saved cache, cookies, and data. As a quick fix, try clearing your browser’s cache and cookies. Repeat this activity regularly to avoid receiving a 400 Bad Request error. Here’s how to get rid of all the saved data and fix the problem:

Step 1: Select the three dots in the top right corner of the browser.

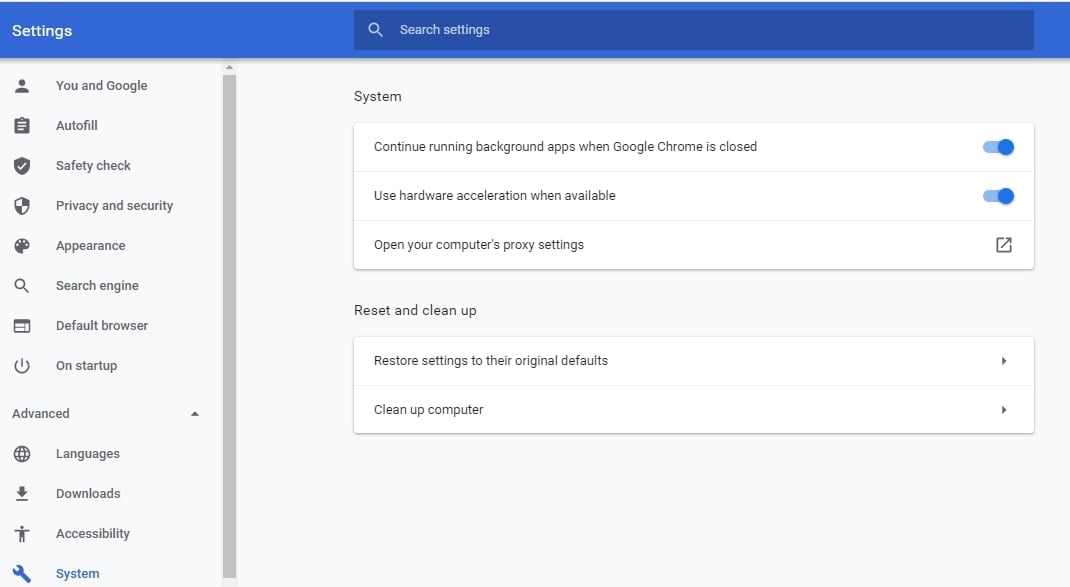
Step 2: From the opened menu, select ‘Settings.’

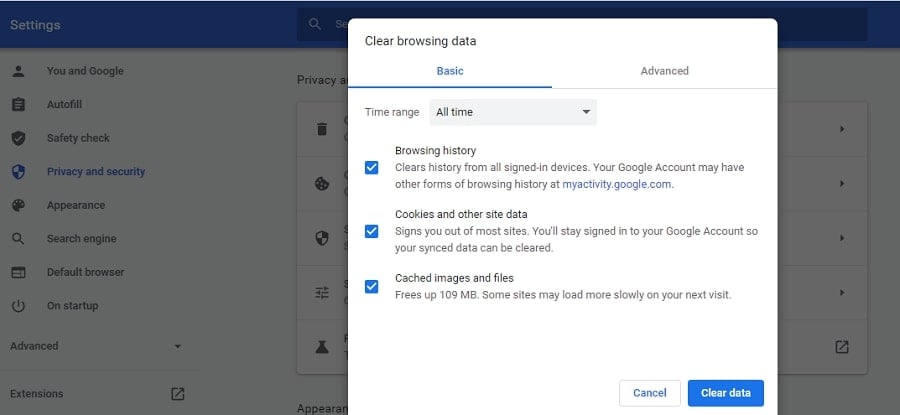
Step 3: Select the ‘Clear Browsing Data’ option from the ‘Privacy and Security’ menu on the left-hand side.

Step 4: There will be three checkboxes; check all of them.

Step 5: Select ‘All time’ as the time range and click the ‘Clear data’ button.

400 Bad Request Error: Clear data

Fix 6: Disabling the browser’s extensions.

Some browser extensions may interfere with cookies, which isn’t a common fix for a 400 Bad Request. Disabling them for a short time may be enough to solve the problem. Follow these methods to deactivate browser extensions:

Step 1: Select the three dots from the browser’s upper right corner in the browser.

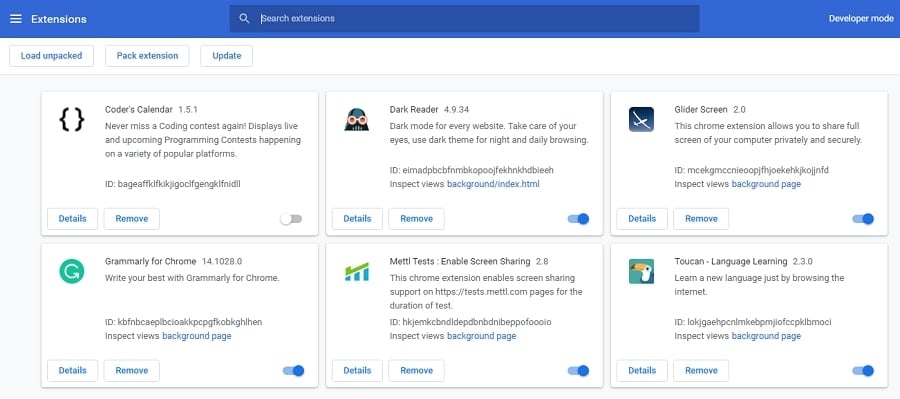
Step 2: Select the ‘Extensions’ option from the ‘More tools’ menu.

Step 3: Deactivate each extension one by one to see if it’s the source of the problem.

400 Bad Request Error: Chrome extensions

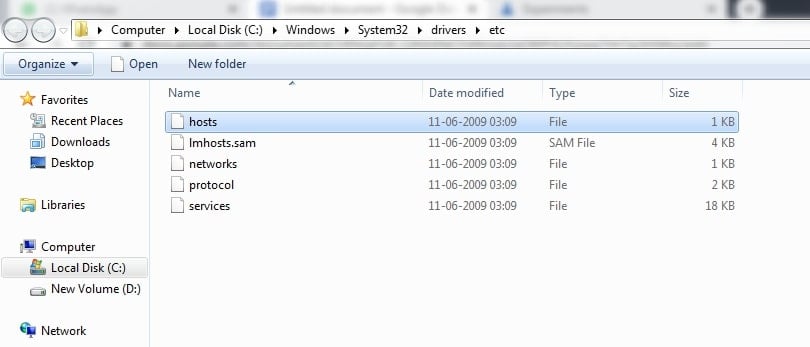
Fix 7: Clearing the DNS cache.

Clearing the DNS cache is a simple process. Clearing the DNS cache is also referred to as flush DNS.

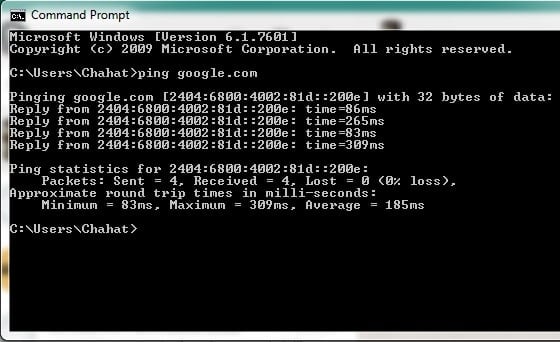
Step 1: Open “Run” (Windows+R) to remove Google Chrome’s DNS cache. Click OK after typing “cmd.” The command prompt will be opened as a result of this.

Step 2: Run the following command at the command prompt: ipconfig/flushdns

Step 3: Press the Enter key. Once the DNS cache has been cleared, you will receive a success message.

400 Bad Request Error: flushdns

Conclusion

An HTTP 400 error, like most other HTTP failures, can be baffling. The cause, on the other hand, is frequently straightforward. This error is frequently caused by outdated browser files and cookies, incorrectly inputted URLs, and inappropriate file sizes.

It’s also useful to remember that all client-side HTTP error status codes begin with the number 4. However, following these steps will help you resolve the 400 Bad request error.

How to Fix the NET::ERR_CERT_AUTHORITY_INVALID Error (9 Fixes)

You may encounter the NET::ERR_CERT_AUTHORITY_INVALID issue even if there is an SSL certificate installed on the website. The invalid certificate authority issue, despite its ominous name, isn’t something to be concerned about.

NET:: ERR_CERT_AUTHORITY_INVALID Error is an SSL error that the website owner can fix. Though there are a variety of factors that might cause this error, these three are the most common ones.

  • It’s a self-signed SSL certificate.
  • The SSL certificate has run out of validity.
  • SSL certificates are issued by untrustworthy sources or certificate authorities.

SSL (Secure Socket Layer) certificates encrypt the network traffic between a web browser and a website. Hackers may use compromised certificates to attack trustworthy sites, which can result in similar issues.

As a result, these error warnings should be taken seriously to avoid future harm.

neterr error

Due to local setup settings, you may occasionally receive the
NET::ERR_CERT_AUTHORITY_INVALID error.

Top fixes for ERR_CERT_AUTHORITY_INVALID Error

Simply put, your browser does not perceive your certificate as legitimate. It displays this error to keep you safe, so you’re aware that something isn’t quite right. Here are a few solutions that will assist you in resolving the issue.

Fix 1: Checking date and time.

Check to see if the system time and date are correct. If the date and time are incorrect, here are the steps that you must follow to fix it:

Step 1: Click the time in the bottom right-hand corner of your desktop screen.

Step 2: Go to the option of ‘Change date and time settings

Step 3: A new window will open up, click on the ‘Change date and time’ option and fix it.

Fix 2: Updating the browser and operating system.

Because it may not support the new version of the SSL encryption technique, an outdated operating system or non-updated browser may cause the NET::ERR_CERT_AUTHORITY_INVALID issue.

To reduce the odds of a mistake, download the most recent operating system and upgrade your browser. Here are the steps that you must follow to update your browser.

Step 1: Open the browser, and then select the three vertical dots from the top right-hand corner.

Step 2: Select the ‘Settings’ option and then go to the ‘About chrome’ option from the left side menu.

neterr update

Google Chrome will begin automatically searching for and installing any available updates. Click the Google Chrome Update button if it doesn’t. To have the update take effect, restart Chrome.

Fix 3: Clearing the browser cookies and cache.

Errors might be caused by expired cookies or browser cache. Open your website in incognito mode to see if they’re the source of the problem. Here is how to do it:

Step 1: Select the three dots from the browser’s top right corner

Step 2: Click on ‘New incognito window’ from the opened menu.

neterr incognito

Now if the error vanishes, then this shows that the saved cache, cookies, and data of the browser were causing the NET::ERR_CERT_AUTHORITY_INVALID error.

Here is how you can delete all the saved data to resolve the issue:

Step 1: Select the three dots from the browser’s top right corner

Step 2: Click on ‘Settings’ from the opened menu.

Step 3: Go to the ‘Privacy and Security’ option from the left-side and then select the ‘Clear Browsing data’ option.

Step 4: Three checkboxes will appear, tick all of them.

err_cert_authority_invalid: clear data

Step 5: Select time as ‘All time’ and click on the button specifying ‘Clear data.’

Fix 4: Deactivating the chrome extensions.

SSL failures are sometimes caused by browser extensions, and deactivating them is the only way to fix the problem. To deactivate browser extensions, follow these steps:

Step 1: Go to the browser and select the three dots from the browser’s top right corner

Step 2: Click on ‘More tools’ and then select the ‘Extensions’ option.

Step 3: Now deactivate the extensions one by one and see if any of them is the cause of the error.

err_cert_authority_invalid: extensions

Fix 5: Properly installing the SSL certificate.

Improper installation can result in the ERR CERT AUTHORITY INVALID issue in Chrome, which can lead to work disruption.

If you are unable to successfully install the SSL certificate on your website, you can seek professional assistance or outsource the process. Because these professionals are up to date on the current SSL developments, they can advise you on how to properly install SSL, reducing the risk of error.

There are various SSL installation guides available, which may provide useful information.

Fix 6: Checking the expiry date of the SSL certificate.

Due to your hectic schedule, you may overlook the SSL expiration dates, resulting in browser problems. SSL could expire for a variety of reasons.

  • The SSL certificate supplier has not enabled ‘auto-renew enabled’ for the website owner.
  • If ‘auto-renew is turned on,’ yet the site owner fails to pay.
  • The owner of a website ignores an email from the SSL provider informing them that their SSL certificate is about to expire.
  • The website owner has made use of a free SSL certificate that will expire in 90 days.

Here is how you can easily check the SSL certificate’s expiry date:

Step 1: Go to the browser and select the three dots from the browser’s top right corner

Step 2: Select ‘More tools’ and then click on the ‘Developer tools’ option

Step 3: Select the ‘Security’ tab and move to the ‘View certificate’ option

Step 4: Check all the details about the SSL certificate from here, including its types and an issuer name, and validation period.

err_cert_authority_invalid: neterr SSL details

Step 5: If the certificate expired, get it renewed to resolve the error.

Fix 7: Resetting the chrome’s default settings.

Sometimes, a change in the chrome settings might also cause the ERR CERT AUTHORITY INVALID error. Here is how you can reset the default browser settings:

Step 1: Open the browser, and then select the three vertical dots from the top right-hand corner.

Step 2: Select the ‘Settings’ option and then go to the ‘Advanced’ option from the left side menu.

Step 2: Now click on ‘Reset and Cleanup’ from the visible menu.

Step 3: Select the ‘Restore Settings’ option and click on the available blue button stating ‘Rest Settings.’

err_cert_authority_invalid: neterr reset settings

Fix 8: Use another network connection.

When utilizing a public network, such as those found in coffee shops or tourist attractions, the NET::ERR_CERT_AUTHORITY_INVALID issue may appear. These networks frequently do not route traffic securely, resulting in a mistake.

If your computer is connected to a public network, try accessing your website over your smartphone’s mobile data. The goal here is to figure out if the problem was caused by the original network.

If the issue goes away when you use mobile data, you know you need to change networks. Signing up for a Virtual Private Network (VPN) is another way to secure your privacy if you frequently use public internet access (VPN).

Even if you use an insecure point of access, a reputable VPN service will help protect your data. If you want to utilize a good VPN service, you’ll have to pay for it, but it’ll be well worth it if you’re constantly on the move.

Fix 9: Turn off your VPN and antivirus software.

If you’re already utilizing a VPN and get the NET::ERR_CERT_AUTHORITY_INVALID issue, it’s possible that the service is to blame.

Turn off your VPN and antivirus software for the time being. Then, to make sure it’s not loading from your browser’s cache, try viewing your site again and forcing a refresh.

Whether the issue has disappeared, try re-enabling both services one at a time to see if the invalid certificate message appears again. This will show you who is to blame.

You can then try to update the software, contact the company’s support team for assistance, or hunt for another option.

Conclusion:

Always obtain an SSL certificate from a reputable Certificate Authority. Many times, digital certificate issues arise because the browser is unable to recognize the certificate issued by an untrustworthy certificate authority. If it doesn’t work, try each of the suggestions in this article one at a time.

To protect your data, provide security to your users, and earn their trust, you’ll need an SSL certificate. Allowing some concerns to prevent you from using an SSL is not a good idea. SSL errors can be resolved if you understand how to debug them.

How to Fix the “Sorry, You Are Not Allowed to Access This Page” Error (8 Easy Fixes)

The WordPress warning “Sorry, You Are Not Allowed to Access This Page” is a helpful measure of security. However, just like the other WordPress errors, including the WordPress HTTP Error, and WordPress Memory Error, it is also highly annoying and hinders the entire website flow.

This is also a major issue if you are locked away from a section of your site that you should be able to enter which is anywhere on the backend as an administrator. If this circumstance occurs, a recent upgrade to a theme, plugin, or WordPress core generally follows.

For a variety of reasons, you can get the warning “Sorry, You Are Not Allowed to Access This Page,” like you may not be recognized as an administrator by WordPress. In other cases, the information in the core code or theme or plug-in of your website might not match what’s in your database.

Another problem is the erroneous information in the wp-config.php file or a website with an obsolete PHP version. Regardless of the source, this error could prevent you from accessing the whole or just part of the admin section.

sorry wp

Since you may be unable to access important settings via the dashboard, the issue must be resolved by using File Transfer Protocol (FTP) or phpMyAdmin. Before you enter the problem-solving procedure, make sure that you backup your site and brush up on these platforms.

The frustrating part about meeting the “Sorry, You Are Not Allowed to Access This Page” message is that it can be difficult to determine which of its causes are involved. Luckily, you may test various solutions to uncover the cause of the problem.

Fixing the “Sorry, You Are Not Allowed to Access This Page” WordPress error

The “Sorry, You Are Not Allowed to Access This Page” problem takes quite some patience to address due to its many possible causes. This extensive list of options will surely help you fix the error and have a happy browsing time.

Fix 1: Restoring the site’s previous version.

The easiest and fastest way to reinstate WordPress is to restore an older version of your website. The reason for the error you notice may be a recent change, such as an update. You should be able to access your site again by undoing your latest edit.

The disadvantage here is that you can lose your recent adjustments and find a means to achieve your aims without making the same mistake again. You may want to restore your backup to a place where you are staging. You can then test various changes to find out what caused the problem. You can retrieve the troubling change to retrieve the access to your site when you have detected the root of the issue.

Fix 2: Disabling all the Plugins.

The recent addition or update of a plugin is a specific alteration that can cause the notice “Do not access this page.”

You should disable your plugins one by one if you feel that is the case.

wordpress_plugins

If a plugin is deactivated and the notice disappears, the origin of the problem is located. This plugin can then solve the problem.

Of course, this approach is somewhat tough if you are locked out fully from your dashboard.

Step 1: You will need to access your website utilizing SFTP.

Step 2: After doing so, browse to wp-content and find the labeling plugins in the subdirectory.

ftp_plugins

Step 3: Enter this folder and then rename your latest additional plugin to “plugin-name-old.” Go back to your website and see if the mistake is fixed. If not, replace the name of the plugin with the next one.

Fix 3: Activating any default theme.

Another likely reason for this problem is the recent upgrade or installation of a theme. Your best bet to resolve this problem is to set a theme like Twenty Twenty or Twenty Nineteen for default WordPress.

Step 1: You will have to use FTP again to do so without access to your admin area. Navigate to wp-content > themes.

ftp theme

Step 2: For disabling your themes, the rest of the process is quite identical to that explained before in plugins.

Step 3: Rename your active theme folder and then login back to your site. You should see a notice that the active theme is broken and a default theme reinstated.

Then you can fix the error.

Fix 4: Ensure that you are an Administrator.

You may also modify your user role unintentionally and no longer be included as an administrator. This is a typical issue with multi-site systems.

Step 1: You need to access phpMyAdmin and see the wp_users table, to determine whether this is the case.

wp user table

Step 2: Search your ID for your username. Navigate to the table wp_usermeta and find the row wp_capabilities. The meta value in this row will read if you have administrative privileges.

a:1:{s:13: “administrator”; s:1: “1”;}

If something else is being said in your wp_usermeta database, you can click and modify the edit link. Also, you can establish a whole new phpMyAdmin Administrator account.

Step a: To take this route, go back to the table for wp_users and click on the top of the table tab Insert.

Step b: Then, add your new user information to the fields. Once the user is finished, click the Go button and the table should show your new user.

Step c: Next, you will need to take a note and head back to the wp_usermeta database to make your account identification.

usermeta_database

Step d: Click Insert again, provide the following information in the resulting fields:

  • Unmeta id: leave this box blank; it is automatically filled in for you.
  • User id: Use WP Users table identification.
  • Meta key: Set this value to “wp capabilities.”
  • Meta value: Add the above line.

Now you need to be able to log in to your WordPress admin area using your new credentials. Remove your old account or modify your user role from the dashboard back to Administrator and delete it instead.

Fix 5: Ensuring that the Database prefix is right.

There is a prefix in each MySQL database. If you see the error “Sorry, You Are Not Allowed to Access This Page,” it might be due to the difference in the database prefix at the wordpress site and the one shown in phpMyAdmin on your website.

This can be the case when your website is migrated, even if you have used a local development site and are now transferring to a live server. You will have to visit your wp-config.php file to check for differences.

Step 1: As stated in earlier solutions, you can do that via SFTP. You should look for your database prefix (default is “wp_”) while you are in your wp-config.php file.

Step 2: Then login and see the tables for your database prefixes in phpMyAdmin. It should match those in your wp-config.php file.

wp config

You’ll need to change it to do so if it does not match the prefix in your wp-config.php file.

Fix 6: Looking for the changes in the wp-config.php file.

Similarly, you should also look for modifications to your configuration file for WordPress. This is especially true if you edited the file soon before the ‘Sorry, You can’t access this page’ notice was sent, or if you suspect that you hacked your WordPress site.

You can use SFTP to access your wp-config.php file and look for anything you don’t feel like. However, if a file integrity monitoring or change detection mechanism is in place, this process is far easier.

Fix 7: Evaluating all the File permissions.

You can also have file permissions from your site manipulated. In this instance, even though you’re listed as an administrator, WordPress may think you are not allowed to visit some portions of your website.

Step 1: You will need to utilize SFTP to access your server to check your site file permissions.

Sorry You Are Not Allowed to Access This Page: file permissions

Step 2: Once logged into, enter the wp-admin, wp-content, and wp-comprises public_html directory. Click right on these folders and select File Allowances:

Make sure the choices are selected in the resulting window:

  • The value is 755 Numeric Value.
  • Check for resources in subdirectories.
  • Select only the application for directories.

Sorry You Are Not Allowed to Access This Page: 755 values

Step 3: If you’re finished, click OK. Then highlight, right-click and choose File Permissions again: all the other files in public_html. This time, set the following parameters in the permission window:

  • The number value is expected to be 644.
  • Recurse should still be verified for subdirectories.
  • Only choose applications for files.

Step 4: Then go back to your site to find out if this solves the problem and the message “Don’t get this page access” is gone.

Fix 8: Resetting the WordPress site.

There may be an installation problem in the worst-case scenario. You must reset your WordPress site to solve it. It is important that when this process has been completed you have an updated backup that will make you lose all postings, pages, and comments. You must reset your site or start a new one.

Conclusion

These were the top eight and most effective techniques to fix the “Sorry, You Are Not Allowed to Access This Page” error. If you go through each of them in the right sequence and have patience above all, then you will easily be able to resolve the error and fix it for a longer period.

What is a 301 Redirect & How To Set Up it (2 methods explained)

What Is 301 Redirect?

301 Redirect is used to guide search engines and your site visitors to a different URL which isn’t the one which they choose from a search engine results page and neither the one that they initially typed into their browsers.

301 redirects

Image Source: netdna-ssl

In order to set up 301 redirect properly (technically) on your website, you can hire an experienced web development company who has a wealth of experience in preparing seamless redirecting maps and implementing them in the best possible way.

But in spite of hiring a professional, it’s equally important for you to gain an idea of how these redirects work and for which reasons you should use them?

When do I need to setup the redirection?

  1. You have a brand new website and you want a permanent redirect
  2. Broken pages or URL
  3. When moving to HTTPS
  4. Overhauling your web portal (redesigning)
  5. Altering URLs for any reason
  6. When removing content or fixing some content related issues
  7. Resolving dynamic URL problems
  8. Changing or merging domains
  9. Maximizing domain authority by linking web conversions with one URL

How the redirection works?

Basically, a 301 redirect command let the site visitors and search engines know that a particular page has been moved to a different page permanently. While 302 redirect indicates the page has bee moved temporarily.

The entire process can be divided into the following three steps:

  • A user or search engine arrives on an original URL
  • The 301 redirect command takes them to the new URL which is not the one which they have typed in the browser.
  • Rewriting URL process starts all over again

Let’s explore an image showcased on Moz in order to understand the entire process in which 301 redirects actually work:

301 redirects working

How Redirection Impacts SEO & Rankings?

Page rankings or SEO performance of a website gets directly influenced by 301 redirects. It can have either a negative or positive impact on the page rank of your web portal.

Having experience in implementing 301 redirects properly can be an integral tool to optimize your website for increased conversions.

301 redirects are also known as permanent redirects and hence all the qualities of the redirected page such as MozRank, page authority, traffic value, PageRank, etc. will get attributed to the detour page.

This makes the detour page represents the redirected one completely.

As a result of 301 redirects, the old page gets eliminated from Google’s index and the new one take its place.

Gradually, Google, as well as the other major search engines, starts giving your new domain preference over the old one in terms of SEO rankings.

Let’s understand it with the help of a flowchart:

301 redirection

Image Source: Hostinger

With the help of 301 redirects, it becomes easier to repurpose old content and make website redesign seamless. Also, it helps in the smooth transfer of authority and proper redirecting set up boost the SEO performance of your website.

Let’s look at a few key benefits of implementing precise 301 redirects:

  • There is no chance of duplicated content as search engines will consider the redirected page as a separate entity.
  • Your daily site visitors will not reduce and they won’t land on a page with a “404 page not found error”.
  • Your page rankings will remain intact and you can easily transfer the authority of the old URL to the new one which will help you in retaining your followers by redirecting them to the detour page.

How To Set Up 301 Redirect?

Well, there are a couple of ways which web experts can use for setting up 301 redirects. These redirects can be easily set up for both a single web page or an entire domain.

Method 1. Editing the .htaccess File

You can set up a 301 redirect by editing your .htaccess file and for doing this you have to sign in to your Account Control Center (ACC) and go to the left sidebar and click on Domains.

Select the “Manage Your Domains” feature from the drop-down list and choose the one that you would like to redirect.

Now you have to go to “Manage Web Settings” which you can find from the drop-down list of the Web Settings section.

You need to click on the “View or Edit Your .htaccess File” option in case you already have a .htaccess file.

But if you have never created such a file you can click on “Create a .htaccess File” option. Let’s understand this process with the help of a screenshot:

htaccess

Image Source: Pair

Finally, to set up 301 redirects you need to include a few lines into your .htaccess file which can be further divided into two main categories:

  • Redirect 301 / http://www.new-domain.com/ (Setting up a redirect for a single web page)
  • Redirect 301 /old-file.html http://www.domain.com/new-file.html (Setting up a redirect for an entire domain)

After finishing this step you only need to click Save Changes if you already had a .htaccess file. Or, tap on Create File for adding new .htaccess files.

Method 2. Using WordPress Plugins

WordPress redirection plugin can also help webmasters in setting up 301 redirects. Also, this plugin can help in keeping a track of 404 errors.

You can find this plugin in WordPress plugin directory.

Redirection WordPress Plugin

Image Source: Inbound Now

For doing this first you need to install and activate the plugin. After completing the activation process you have to visit the “Tools” section and click on “Redirection” to set up your redirects.

Here you can pop in the old URL as well as the new destination URL. After inserting both of these you just have to tap on “add redirection” in order to complete the setup process of 301 redirects.

You can look at the image given below and understand how to execute the entire process.

Setting up new redirection

Image Source: WPBeginner

301 redirect can help your web portals perform better in terms of SEO and retain its visitor base if executed properly.

But an inappropriate approach towards setting up these redirects can hurt your page rankings and can make you lose your precious customers.

Conclusion

In a nutshell, a 301 redirect can be easily set-up by following the above-mentioned best practices. Moreover, it can be one of the best tools to optimize your website for maximum visibility.

Also, through 301 redirects you can make sure that the online traffic is guided towards the most updated version of your URL.

But, for ensuring that these redirects would not have an adverse impact on your rankings and organic traffic, having an appropriate approach towards setting them up is mandatory.

So, we wish you good luck with your next web portal redirect strategy and may it gives you an opportunity to reap rich rewards in the future.

How to Fix Error 521 with WordPress and Cloudflare

Error 521 is a Cloudflare unique error message which occurs when you decline a connection with Cloudflare to the server on your WordPress site.

Basically, that indicates your web browser could connect to Cloudflare successfully, however, Cloudflare could not connect to the original web server – AKA the server on your WordPress website.

Cloudflare specifically tried to connect to the server of your WordPress website but received a rejected connection in reply.

error 521

Since Cloudflare cannot connect to your website, it cannot show a visitor to your website and instead displays the notice of Error 521. Error 520 is another common error for Cloudflare users.

What causes the message of Error 521?

Usually, one of two scenarios causes the Error 521 message:

  • First, it can be that the WordPress server site itself is down. Even if everything is properly configured, Cloudflare will simply not be able to connect if the server on your WordPress site is offline.
  • Second, your web server could work well, but for some reason, it will deny Cloudflare requests. Some server-side safety solutions might accidentally block the IP addresses of Cloudflare, because of how Cloudflare works.

Since Cloudflare is a reverse proxy, all traffic arriving at your server is shown to come from a small number of Cloudflare IPs (rather than the unique IP address of each individual visitor). Some security systems, therefore, consider and restrict high traffic from a small number of IP addresses. Cloudflare cannot connect if this occurs and instead displays the error message 521.

Here are the fixes for the error to ensure that you don’t get stuck with any hassles.

Fix 1: Search whether the server of your site is down

Server downtime among respectable companies is relatively uncommon. Many suppliers have virtually impeccable timings. So you can probably rule it out as the origin of error 521 unless you use an unreliable web host.

However, it is still a good idea, especially if you’re new to your current web hosting provider, to ensure this is not the problem. There are various ways to check and see if your site is online or if you cannot visit your website due to error 521. For instance, in the terminal, you may run a ping command, which works no matter which OS you are using.

The ping function performs an easy test to see if the server is accessible and ensure that you have no problems with connectivity. Follow the steps provided below to move ahead:

Step 1: Open the Windows PowerShell or command prompt.

Step 2: Type ping website name and press enter.

ping 521

If you receive a server answer, it’s ready and accessible.

Fix 2: Whitelist all Cloudflare IP fields in the firewall of your server

The next fix is to Whitelist all the Cloudflare IP ranges, so you will ensure your server does not block them while your WordPress website’s server is working regularly. You’ll want to see that in .htaccess, iptables, or your firewall you don’t block these IP addresses.

You may already have observed that the .htaccess file has a lot to do with issues if you have previously tried to fix WordPress bugs.

The same goes for this. Here too, you can blame the .htaccess file. So we’ll examine how that problem can be resolved. We can’t just recreate the file and rectify the problems, unlike other errors. We must also do additional things here in order to make sure the file is correct.

The error 521 is not the cause of the corrupt .htaccess file. Therefore, the solution is different too. How can you repair that, we’ll see below.

Step 1: Go to your cPanel and then find the .htaccess file from there and open it.

htaccess file 521

Step 2: Paste the following command there, after replacing the ip address with your choice:

< RequireAny >

Require all granted

Require ip 127.0.0.1

< /RequireAny >

If you wish to whitelist multiple addresses, repeat the required ip line with the specified ip addresses.

You can try reloading the webpage to check whether it works, once you remove the blocking of IP addresses. It will certainly solve the problem.

Fix 3: Contact the Assistance

You can certainly call for assistance when nothing works, and look at what you have to say about it. Now, two possibilities are still available. You may be confused about contacting hosting support or contacting CDN assistance.

First, you can call the hosting aid and ask if or not there is a problem with the server. You can then contact the Cloudflare support staff if it does not function.

In most cases, the hosting problem is not Cloudflare. You should therefore initially contact the hosting assistance and then contact Cloudflare help if you have no solution to see what is happening there. Finally, you’ll certainly be able to find the solution to all the problems. You should therefore first make the tricks described above and you can contact support if nothing works.

Conclusion

Error 521 is usually found in your distribution of content when you initially integrate Cloudflare. Cloudflare accelerates websites, protects them against threats, and keeps them always online, making it easy to use web apps with a single click.

Cloudflare supports websites, no matter what the size or platform is, without the addition of any hardware, without installing any software or changing a line of code.

8 Best Dedicated Server Hosting [Personally Tested]

What is a Dedicated Server Hosting?
Most web hosting companies provide an option to use dedicated servers apart from other hosting options such as shared hosting, and VPS hosting.A dedicated server hosting provides a dedicated hardware and software for website processing. So it’s only you who rents this dedicated server and does not have to share these resources.

This can be managed dedicated hosting, where the web hosting provider will configure and manage the servers.

In some cases, this can also be unmanaged dedicated hosting, where the client company will remotely operate and manage the dedicated server resources.

How to Fix the ERR_SSL_PROTOCOL_ERROR

If the website you are considering is not loading a secure connection, and you’re getting an error like ERR_SSL_PROTOCOL_ERROR, you are at the right spot. In this article, you will understand the implications of this type of mistake and take the necessary measures to resolve it to restore and operate your site!

This error may be caused by several problems with or in combination with your website server or local computer. It’s frequent on Chrome, but it can differ based on your browser.

It would be helpful for you to take a moment and recall any modifications that were done recently to your site before we check into any of the probable underlying main reasons for ERR_SSL_PROTOCOL_ERROR.

error

Usually, it’s pretty stable when you have a secure connection. And most of the time, problems happen, either when something has changed on the server-side of the current websites or when you first set up the new site.

For example, you should expect a DNS_PROBE_FINISHED_NXDOMAIN error if the requested site does not exist.

Have you moved hosts recently, or have you attempted to install new SSL certificates? This is the main reason why this mistake happens. It causes various SSL connection errors, including SSL Handshake Failed Error, and ERR_SSL_PROTOCOL_ERROR.

Why does ERR_SSL_PROTOCOL_ERROR occur?

One of the reasons for this SSL connection error is because your browser never shows where the issue comes from. As such, you might have to solve a lot of problems to see where the problem arises.

However, here are some root causes of ERR_SSL_PROTOCOL_ERROR:

  • The date and time of your device is wrong
  • You are preventing your antivirus software
  • Chrome extensions are dangerous or damaged to your browser
  • You have corrupted HOST files on the website you are attempting to reach
  • It’s time for deleting your browser cache and cookies.

ERR_SSL_PROTOCOL_ERROR Solutions

Work one by one through the remedies in the following sections until your secure connection error has been corrected. This type of mistake can occur locally or on the server. Some steps, therefore, focus on the settings for your local computer/browser, while other actions address server configuration issues and configuring the SSL certificate.

Fix 1: Clearing the SSL State

First of all, the SSL state in Chrome must be clarified. The browser maintains SSL certificates in a cache to accelerate connections once an initial secure link to a website is formed.

To optimize website load times, each HTTPS request would require the download and authentication of an SSL certificate that wouldn’t perform very well. In addition, following the propagation of DNS settings and access to the site in a secure browser connection, an error can occur due to the browser cache, which stores an outdated version of the SSL certificate.

Try to clear the SSL cache to remedy this. Once your browser has been restarted, attempt again to connect to the site. Follow these procedures to clear the SSL status on Windows in Chrome:

Step 1: Click the three dots (menu icon) from the top right corner of the browser and then select the Settings option.

Step 2: Move to the Advanced settings option and select the System option. There click on the option stating Open your Computer’s Proxy Settings.

system proxy option

Step 3: You will see a new dialog box. There click on the Content section and click on the Clear SSL State button.

clear SSL

Step 4: Click OK and then restart Chrome to see if the error is resolved or not.

Fix 2: SSL Certificate Check

A similar problem arises with generating an SSL certificate if the DNS settings have not yet fully propagated. In this instance, the SSL certificate will not be linked with the right domain at the time of creation.

You can also use an online SSL scan tool to ensure that your SSL certificate has no problem. This inspection method is quite reliable and will circumvent your browser cache to establish whether the certificate is legitimate.

The Qualys SSL Labs’ SSL Check Tool is a good idea.

ssl server test

Just input the field Hostname in your domain and click the Enter button. The results of the SSL certificate verification are provided once the scan has been completed. If everything is fine, you should see a rating like an A.

Fix 3: Checking the Time and date of the system

It’s time that you check your local computer’s date and time settings to locate the source of your ERR_SSL_PROTOCOL_ERROR if the SSL certificate is legitimate and clearing the SSL state does not function.

First, verify that the time and the date of your operating system are correctly configured. Otherwise, your SSL certificate may have problems. SSL certification has a predetermined end date and may clash with the authentication procedure if your current system time and date are not valid.

When a secure connection is established, correct time and date are always required, so it is necessary to ensure the correct value from your local system is obtained.

To check the date and time settings, do the following:

Step 1: Click the date and time display from the bottom corner of your system and select the Change date and time settings option.

change date n time

Step 2: Click on Change date and time, fix them if they are incorrect, and click OK.

Step 3: Click on the Change time zone option and check if the correct zone has been set.

Fix 4: Clearing the Cookies and Clearing Browser Cache

If it’s been a while since it was last clear, you can also attempt to remove your browser cache. It is also recommended to erase browser cookies, but remember that you will need to log in the next time you access the websites you are now in. To clear the cookies, caches, and other data, do the following:

Step 1: Click the three dots (menu icon) from the top right corner of the browser and then select the Settings option.

Step 2: Go to Privacy and Security, select Clear Browsing data, set time range as All-Time, and click on the Clear data button to clear all the stored cookies and cache.

clear browsing data

Fix 5: Disable Extensions of Browser

If you have enabled several browser extensions, this may be the source of ERR_SSL_PROTOCOL_ERROR. Temporarily disable one-by-one browser extensions to see whether there are problems with HTTPS requests.

Step 1: Click the three-point icon at the top right of the browser window to deactivate Chrome extensions, then choose More Tools > Extensions from your pop-up menu.

Step 2: Toggle all the browser extensions you have enabled to disable them one at a time and access the website between them.

extensions

Step 3: If the problem of ERR_SSL_PROTOCOL_ERROR appears to be from an extension, delete or deactivate it until you have learned more about the cause of the error.

Step 4: The best way is to uninstall the extension if no update is available to fix the problem.

Fix 6: Updating to get the latest version of the browser

The next step in the browser is to update the current version of Chrome.

If you run older browser versions, you are more likely to have secure connection issues like ERR_SSL_PROTOCOL_ERROR. However, modern browsers constantly include new and updated security measures, and problems are regularly corrected, and keeping everything up to date is the best approach.

This is simplified by the Chrome browser, which automatically looks for updates when you run the software. However, it would be best to remember to restart the browser from time to time to activate update checks. Also, you can do it manually by doing the following:

Step 1: Click the three dots (menu icon) from the top right corner of the browser and then select the Settings option.

Step 2: Go to the About Chrome option, and then Chrome will automatically check for the updates.

chrome update

Step 3: If any update is available, get it done and then restart the browser to see if the error is resolved or not.

Fix 7: QUIC Protocol Disable

The QUIC technology allows Chrome browsers to connect to a secure website effortlessly. But it can sometimes be an issue too.

So you will want to stop the QUIC protocol on your browser if your SSL error has not been cleared until now.

To achieve this,

Step 1: Copy and paste into your chrome address bar the following line of code: chrome://flags/#enable-quic

ERR_SSL_PROTOCOL_ERROR: QUIC protocol

Step 2: Next, disable Experimental QUIC. When it’s finished, restart your browser.

Fix 8: Removing the hosts file from the system

Another way to resolve the error ERR_SSL_PROTOCOL_ERROR is by removing the hosts file from your device, and here are the steps for it:

Step 1: Press windows key + R and then on the opened run command window, type C:\\Windows\System32\drivers\etc.

ERR_SSL_PROTOCOL_ERROR: hosts file

Step 2: Move to the hosts file, right-click on it and delete the same.

Step 3: Restart the website and check if this resolves the error.

Fix 9: Enable all versions of TLS/SSL.

This is the last way to solve this problem if all other techniques fail.

However, all TLS/SSL versions can also be activated, which can be very hazardous in some situations, even on sites with obsolete or insecure SSL protocols. This is why this procedure is not suggested in particular.

However, you can try it out as your final resort if all other procedures fail.

All TLS/SSL versions can be activated by doing the following:

Step 1: Click the three dots (menu icon) from the top right corner of the browser and then select the Settings option.

Step 2: Move to the Advanced settings option and select the System option. There click on the option stating Open your Computer’s Proxy Settings.

Step 3: Now open the Advanced section, move to Security, and check all TLS/SSL versions.

ERR_SSL_PROTOCOL_ERROR: enable all TLS n SSL

Step 4: Restart the browser and check if the error is resolved.

Conclusion

These steps will surely help you resolve the error ERR_SSL_PROTOCOL_ERROR and have a happy browsing time. It just requires you to be patient and then try every step in the proper sequence, and then you are good to go!