
Today I am going to show you how to start a blog from scratch. And you won’t believe how easy it is to do.
So, let’s start your blogging journey!
We will need 4 things:
- havaĵo – Domain is the name of the blog which you type in the browser address bar. “www.HostingPill.com” is the domain of this site.
- retprovizanton – Hosting is the “home” of your blog where it will “stay”. It is usually a server at a web hosting company.
- WordPress – WordPress is the “software” that will power your new blog.
- Design & Themes – To make your blog attractive design-wise you will need to install WordPress themes.
Lernu pri la specoj de retejoj vi povas krei per WordPress kaj scias kiel vi povas protect the blog iam, kiam ĝi finiĝos.
Ekzistas du manieroj per kiuj vi povas aĉeti domajnojn kaj gastigi:
- Vi aĉetas domajnojn kaj gastigantojn de la sama ret-gastiganto
- Aŭ vi aĉetas ambaŭ aparte
If you ask me, I would recommend going for Option 2 (buying separately) for two reasons:
- Vi ricevas pli bonajn ofertojn kiam vi aĉetas domajnojn kaj gastigas aparte.
- Vi reduktas riskon aĉetante ĝin de apartaj kompanioj.
mi rekomendas Namecheap por akiri viajn domajnojn kaj Bluehost por reteja gastigado.
Namecheap, kiel la nomo implicas vendas domajnajn nomojn por bona prezo, ne necesas aĉeti vian domajnon kaj gastigi de la sama provizanto, do mi aĉetis ĉirkaŭe.
BlueHost - Mi estas uzante Bluehost de ĉirkaŭ 8 jaroj nun por iuj el miaj retejoj kaj trovis ilin sufiĉe fidindaj.
In this step by step guide, I’m going to buy a domain, set up web hosting, install WordPress, configure WordPress and then talk about how you can make money blogging.
 Kiel Komenci Blogon
Paŝo 1. Registru Vian Domajnon
NOTO: Se vi jam posedas domajnon, vi povas preterlasi ĉi tion kaj rekte iri al
Kiel Agordi Gastigadon por WordPress sekcio.
Unue aferoj unue estas tempo aĉeti la domajnon. Vi volas pensi pri kia domajno vi volas kaj kion ĝi diras pri via WordPress-blogo.
Kredu min, elekti la ĝustan domajnan nomon estas malfacila tasko nuntempe, ĉar ĉiuj "bonaj" jam malaperis ".
Vi eble volas kontroli ĉi tiujn 7 Konsiletoj pri Domajna Nomo to get the right name for your site or you can use these tools to generi ideojn pri domajna nomo.
Once you have listed some of the domain name options, it’s time to check their availability.
Kaj por tio, sekvu la paŝojn sube:
Paŝi 1. Iru al www.Namecheap.com kaj tajpu la domajnon, kiun vi volas, en la serĉan skatolon de domajno.

Paŝi 2. If your domain is available then add it to the cart, consider also purchasing other TLD (Top level domains) of your name, for example, if your domain is ‘mytestdomain.com’ you might also want to pick up ‘mytestdomain.net’ and ‘mytestdomain.org’.
If your domain isn’t available, you’ll have to think of something else!

Paŝi 3. Click on ‘View Cart’. Make sure everything is as you expect and double-check your domain name is spelled correctly. If you are buying a .com domain, you will notice that you also must pay a small ICANN fee.

Paŝi 4. Konfirmu vian ordonon, mi rekomendus agordi la domajnon al Aŭtomobila Renovigo.

Paŝi 5. Ĝi nun petos vin krei konton, plenigu ĉiujn detalojn kaj certigu, ke vi memoras la pasvorton!

Paŝi 6. En la sekva paĝo, ĝi petas vin plenigi la kontaktajn informojn de via konto. Se vi ne elektis domajnan privatecon, tiam ĉi tiu informo estas publika por iu ajn vidu. Alklaku "Daŭrigi"

Paŝi 7. Pay for your domain, you can choose from a credit card or PayPal. Click ‘Continue’ and that’s it, you are now the proud owner of your new domain.

Paŝo 2. Agordi Gastigadon Por WordPress
Elektante la right web hosting company is a very important factor in starting a blog.
La merkato inundas kun centoj da retaj kompanioj kaj ili uzas ĉiujn taktikojn por akiri vian komercon.
I have listed & answered few questions that most first-time site owners have about hosting.
Vi povas vidi ilin tie.
Nun, ke vi pretas, ni venu al nia gastigado.
We will setup your Bluehost account to start your first blog.
It offer a free domain (on Annual plans) and a 30 day money back guarantee, so you never have to worry about anything.
Paŝi 1. Iru al www.Bluehost.com kaj alklaku butonon Komenci.

Paŝi 2. Elektu la planon, kiun vi volas aĉeti. Por ĉi tiu demo, ni iros kun ilia Baza Plano.

Paŝi 3. On this page, depending on whether you have a domain or want to get a new one, you can make your selection.

Paŝi 4. Once you have the domain, it’s time to enter your contact details.

Paŝi 5. Nun elektu la planon, kiun vi volas iri. Ju pli longe vi elektas, des pli multe da rabato vi ricevos.

Paŝi 6. Enmetu viajn kreditkartajn detalojn kaj faru la pagon.

Paŝi 7. Post kiam tio estas farita, kreu vian pasvorton sur ĉi tiu ekrano (ne forgesu, ke ĝi konservu vian pasvorton ie por estonta referenco)

Paŝi 8. Now that you have created the password, it’s time to login!

Paŝo 3. Konektu vian Domajnon al Gastigado
Do, post kiam vi aĉetis vian WordPress-gastigadon de Bluehost vi bezonos agordi vian Namecheap domajno por atentigi pri ĉi tiu gastigado.
Paŝi 1. Ensalutu vian BlueHost account
Paŝi 2. Alklaku domajn agordojn
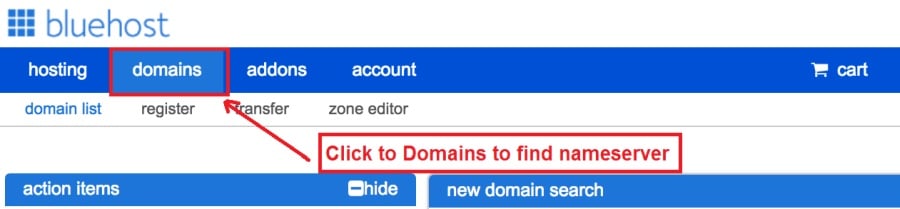
Paŝi 3. Click on the ‘Nameservers’ tab
Here are the default Nameservers of Bluehost:
NS1.Bluehost.com
NS2.Bluehost.com

Paŝi 5. Go to Namecheap and Login.
Paŝi 6. Once you logged in go Domain List ==> Domains ==> Select Domain ==> Select Manage ==> Under NameServers, select Custom and place your Bluehostestas nomumiloj tie

Paŝi 7. Alklaku Konservi ŝanĝojn.
Ĝi povas preni ĝis 24 horojn por fini ĉi tiun ŝanĝon, do ne maltrankviliĝu se ĝi ne funkcias tuj.
Paŝo 4. Instalu WordPress
Next, we need to install WordPress on the Bluehost retprovizanton.
BTW, WordPress is a blogging platform for writing blog posts.
Feliĉe Bluehost havas aŭtomatan instaladon do mi montros al vi tion.
Paŝi 1. Ensalutu al Bluehost

Paŝi 2. En la retejo-sekcio alklaku 'Instali WordPress'

Paŝi 3. Elektu la domajnon, kiun vi volas uzi por ĉi tiu WordPress-instalaĵo, vi probable nur havos unu domajnon. Lasu la dosierujan kampon malplena.

Paŝi 4. Now enter your blog name (can be changed later), username, email address, and password. Make sure to keep a note of these details. Make sure your password is secure, use an online password randomizer if possible, people will try to breach your WordPress blog.

Paŝi 5. Vi povas rigardi la progresan instaladon ĉe la supro de la paĝo, kvankam tipe instalado daŭras 5 minutojn.


Kiel vi povas vidi, ĝi estas simpla por instali WordPress.
Now you can browse to http://yourdomain.com/wp-admin to login.
Step 5. Create a Blog in WordPress
Let’s get logged into the new WordPress blog.
1. Iru al http://yourdomain.com/wp-admin kaj enigu vian uzantnomon kaj pasvorton.

2. Vi nun povos vidi la administran panelon.

Unufoje ensalutinta indas akiri kelkajn aferojn ordigitaj antaŭ ol ni trapasos temojn, kromaĵojn kaj aldonante enhavon.
Agordu Titolo kaj Agordu Ĉefpaĝon
Estas kelkaj aferoj, kiujn mi ĉiam ŝatas agordi tuj post instali WordPress
Settings -> General Settings. Here you can set your blog title, tagline, main email address, time zone, date format & Language. Make sure you set all of these things correctly now, as it may come back to haunt you if you don’t!

Settings -> Reading. Here you can decide what function you want your WordPress blog to take. You can set your front page to take people straight into the blog post or you can set which static page you want to be your home page.

Tio estas ĉio, kion ni vere bezonas agordi por nun. Ni povas moviĝi al la pli interesaj aferoj!
Kiel mi kreu novajn Paĝojn kaj Afiŝojn?
To add new pages, go to Pages -> Add new, fill in your title, add some content and click publish. If you aren’t ready to publish the page, click draft.

To add a new post go to Posts -> Add New, it’s then the same procedure as above.

Kiel Aldoni Paĝojn / Afiŝojn al la Menuo
To add these pages to the menu, go to Appearance -> Menu. Select your menu and select ‘add to menu’, you can then drag and drop to arrange it.

Themes & Design
With WordPress, it’s really easy to create any design you can imagine without writing a single piece of code. And that is made possible only by WordPress themes.
WordPress has a lot of free theme designs to choose from.
Kiel trovi la perfektan WordPress-temon
Se vi ne trovas ĉi tion, kion vi serĉas ĉi tie, vi povas serĉi pliajn elektojn ĉi tie:
ThemeForest – One of the oldest and the largest marketplace for WordPress theme. You get tons of high-quality themes at reasonable prices.

Krea vendejo – A newer marketplace with quite a variety of WordPress themes. The themes on this site are quite different in terms of design than what you get on Themeforest.

GretaTemoj – Another great platform where you can get free and premium beautiful WordPress theme for your site.

Astra – Astra is the most lightweight and fully customizable WordPress theme.

It provides basic and advanced design options for blogs, single blog pages with a dedicated Blog Pro addon. Astra works seamlessly with all popular page builders like Beaver Builder, Elementor, etc.
How do I Install WordPress Theme
To install a new theme for your WordPress blog, follow these steps:
Paŝi 1. Kiam vi ensalutis en la administran panelon elektu 'Apero' kaj tiam temojn el la maldekstra menuo.

Paŝi 2. Alklaku la butonon 'Aldoni Nova'
Paŝi 3. Search for your WordPress theme using the search bar at the top right. If you have been provided a theme file you can select upload theme from the top of the page.

Paŝi 4. Alklaku Instali
Paŝi 5. After a minute or so the new theme will finish installing. Now you can click customize and see what options you can change. This will vary a lot from theme to theme but usually, you can edit things like your logo, the rough layout of the page and some colors.


instali Kromaĵoj
Kio estas kromaĵo?
Plugins – as the name suggests are tools that add functionality to your WordPress blog. The best thing which I like about WordPress is – these plugins.
Plugins can turn your site from a simple blog to a fully-featured e-commerce store, a user forum, a video streaming site, a member’s only site, and much more. Of course, you can combine most of these plugins together to add huge functionality to your blog.
Ekzemple, se vi uzas vian WordPress-ejon por vendi produktojn interrete, eble utilas aldoni forumon por subteno.
Kiam ajn vi volas aldoni funkciojn al WordPress-retejo, rigardu kromaĵojn antaŭ ol rigardi krei ion mem / pagi programiston por fari ĝin por vi.
Instali kromaĵojn estas facila, la malfacila parto decidas, kiujn kromaĵojn vi volas instali. Estas miloj da kromaĵoj disponeblaj senpage, ankaŭ ekzistas multaj premiaj kromaĵoj.
Where I can find more WordPress Plugins?
La du plej bonaj rimedoj en la interreto por WordPress-Kromaĵoj estas:
1. WordPress.org – Tons of free plugins! But beware – some of the plugins are demo versions of the paid ones. Still, it’s a good place to find what you are looking for.

2. CodeCanyon – Home to some of the best plugins on the internet. Although they are paid, they offer really good value for money. I usually get my plugins from here.

Kaj estas malmultaj avantaĝoj de irado de pagitaj kromaĵoj CodeCanyon:
- You get 6 months of free support from the plugin developer. So, if something is not working, you can approach the plugin developer via CodeCanyon kaj ili riparos ĝin por vi. Kio estas pli, vi povas etendi garantian subtenon dum 12 monatoj pagante nominalan kotizon.
- La kromaĵoj estas altkvalitaj, ĝisfunde kontrolitaj CodeCanyon. So, there are no chances of any malware in them. I had a bad experience in the past when I bought some free plugins from some random site.
Post kiam vi decidis pri kromaĵo jen kiel vi instalas ĝin.
Kiel Instali WordPress-kromaĵon
Paŝi 1. From the Admin Dashboard select Plugins -> Add New
Paŝi 2. Serĉu la kromaĵon, kiun vi volas, aŭ alŝutu ĝin se vi havas la dosierojn

Paŝi 3. Alklaku Instali, kaj donu al ĝi kelkajn minutojn por instali, ju pli granda la kromaĵo, des pli longe necesos instali.
Paŝi 4. From the Plugins -> Plugins page activate your plugin, depending on the plugin you are using you may then be prompted to fill in some additional settings.
Here are some of my favorite Plugins:
Senpagaj Kromaĵoj:
- Contact form 7 (Free)– This is a simple free email contact form for your blog. It’s easy to set up, always works, and doesn’t take up much space!
- Askimetro (Senpaga) - Se vi eĉ pripensas permesi komentojn en via WordPress-blogo, vi bezonas la kromprogramon por Askimet-komentoj. Ĉi tiu kromaĵo amase reduktas la nombron de spammaj komentoj, kiujn vi ricevos.
- Yoast SEO (Senpaga) – Download this plugin before you download any. It’s a MUST HAVE plugin for SEO.
Pagitaj Kromaĵoj:
- Vida Komponisto (Pagita) – It’s THE BEST Page Builder for WordPress. Just drag and drop and you can create stunning page layouts in minutes. Love it!
- Popupoj Ninja (Pagita) – If you ever want to have the ability for the user to signup for your email newsletter from your blog, this is the plugin to have. Few clicks and you get a beautiful popup done.
- BackupGuard (Paid) – It’s too easy to accidentally break your WordPress blog when installing a 3rd Party Plugin or theme, make sure you always havas sekurkopiojn. And this plugin does just that. It’s a lifesaver!
Kiel Gajni Monon el Via Blogo
Now that you have your WordPress blog nicely set up, with some content, a ŝika WordPress-temo, and some great functionality added by Plugins it’s time to monetize your blog! There are two core methods to for making money from your blog, and everything boils down to these
Filia
Affiliate marketing is where you promote other company’s products directly and earn a commission from any sales made.
For example, say you have a football blog, you could add affiliate links to football boots in your posts and make a commission off any boots sold, typically this would be 5 – 15%.
Estas centoj da filiaj merkatigaj skemoj tie, vi devas esplori tion pli depende de via niĉo, vi surprizus kiom da kompanioj havas skemojn. amazono offers one of the most popular ones, it’s easy too!
Add special affiliate links to ANY product on the Amazon and make a commission of 4 – 10%. Amazon may not be the best paying site (this will vary wildly depending on the niche of your blog), but they do offer a HUGE range of products.
Avizoj
Adverts are simple, got spare space on your blog, place an advert, often you will find these placed in the sidebar and within the content of any articles. Adverts can generate anything from $0.05 to $5 per click depending on the niche of your blog.
Google AdSense is the de facto online advertising company, simply fill in a 2-page signup form and you can start serving adverts to all your visitors. You don’t have to talk directly to companies to sell your advertising space.
Google’s advertising pay-outs differ massively from niche to niche, a highly competitive niche like credit cards, insurance, loans, etc.. will pay higher than less competitive ones.
Ĉi tio estas pro la naturo, kiu reklamas por varbi sian reklamon, en ĉi tiu pli "populara" estas via blogo, des pli vi povas enspezi por gajni.
Typically, you might expect something like a 0.5 – 3% click-through rate, i.e. the number of your visitors who actually click on the adverts.
Bona kombinaĵo de ambaŭ strategioj kutime rekomendas.
sekva Paŝoj
Now that your WordPress blog has been set up and you’ve monetized it’s time to start expanding and really pushing your blog.
Here are my top tips going forward:
- Planu regulan enhavon, you won’t always be in the mood to write content, use the built-in post scheduler so you can write multiple posts when you feel like it while still allowing regular content to flow. Articles every few days are better than 5 on the same day. Here is another WordPress-aŭtomata solvo.
- Lernu ĉion pri SEO (search engine optimization) that you can, this is a huge topic, you will never fully learn it, but the more you know the more successful blog will be.
- Daŭre pozitiva, your blog will unlikely blossom overnight, it takes months of hard work, but in the end dedication and good content pays off.
Good luck and start blogging!


